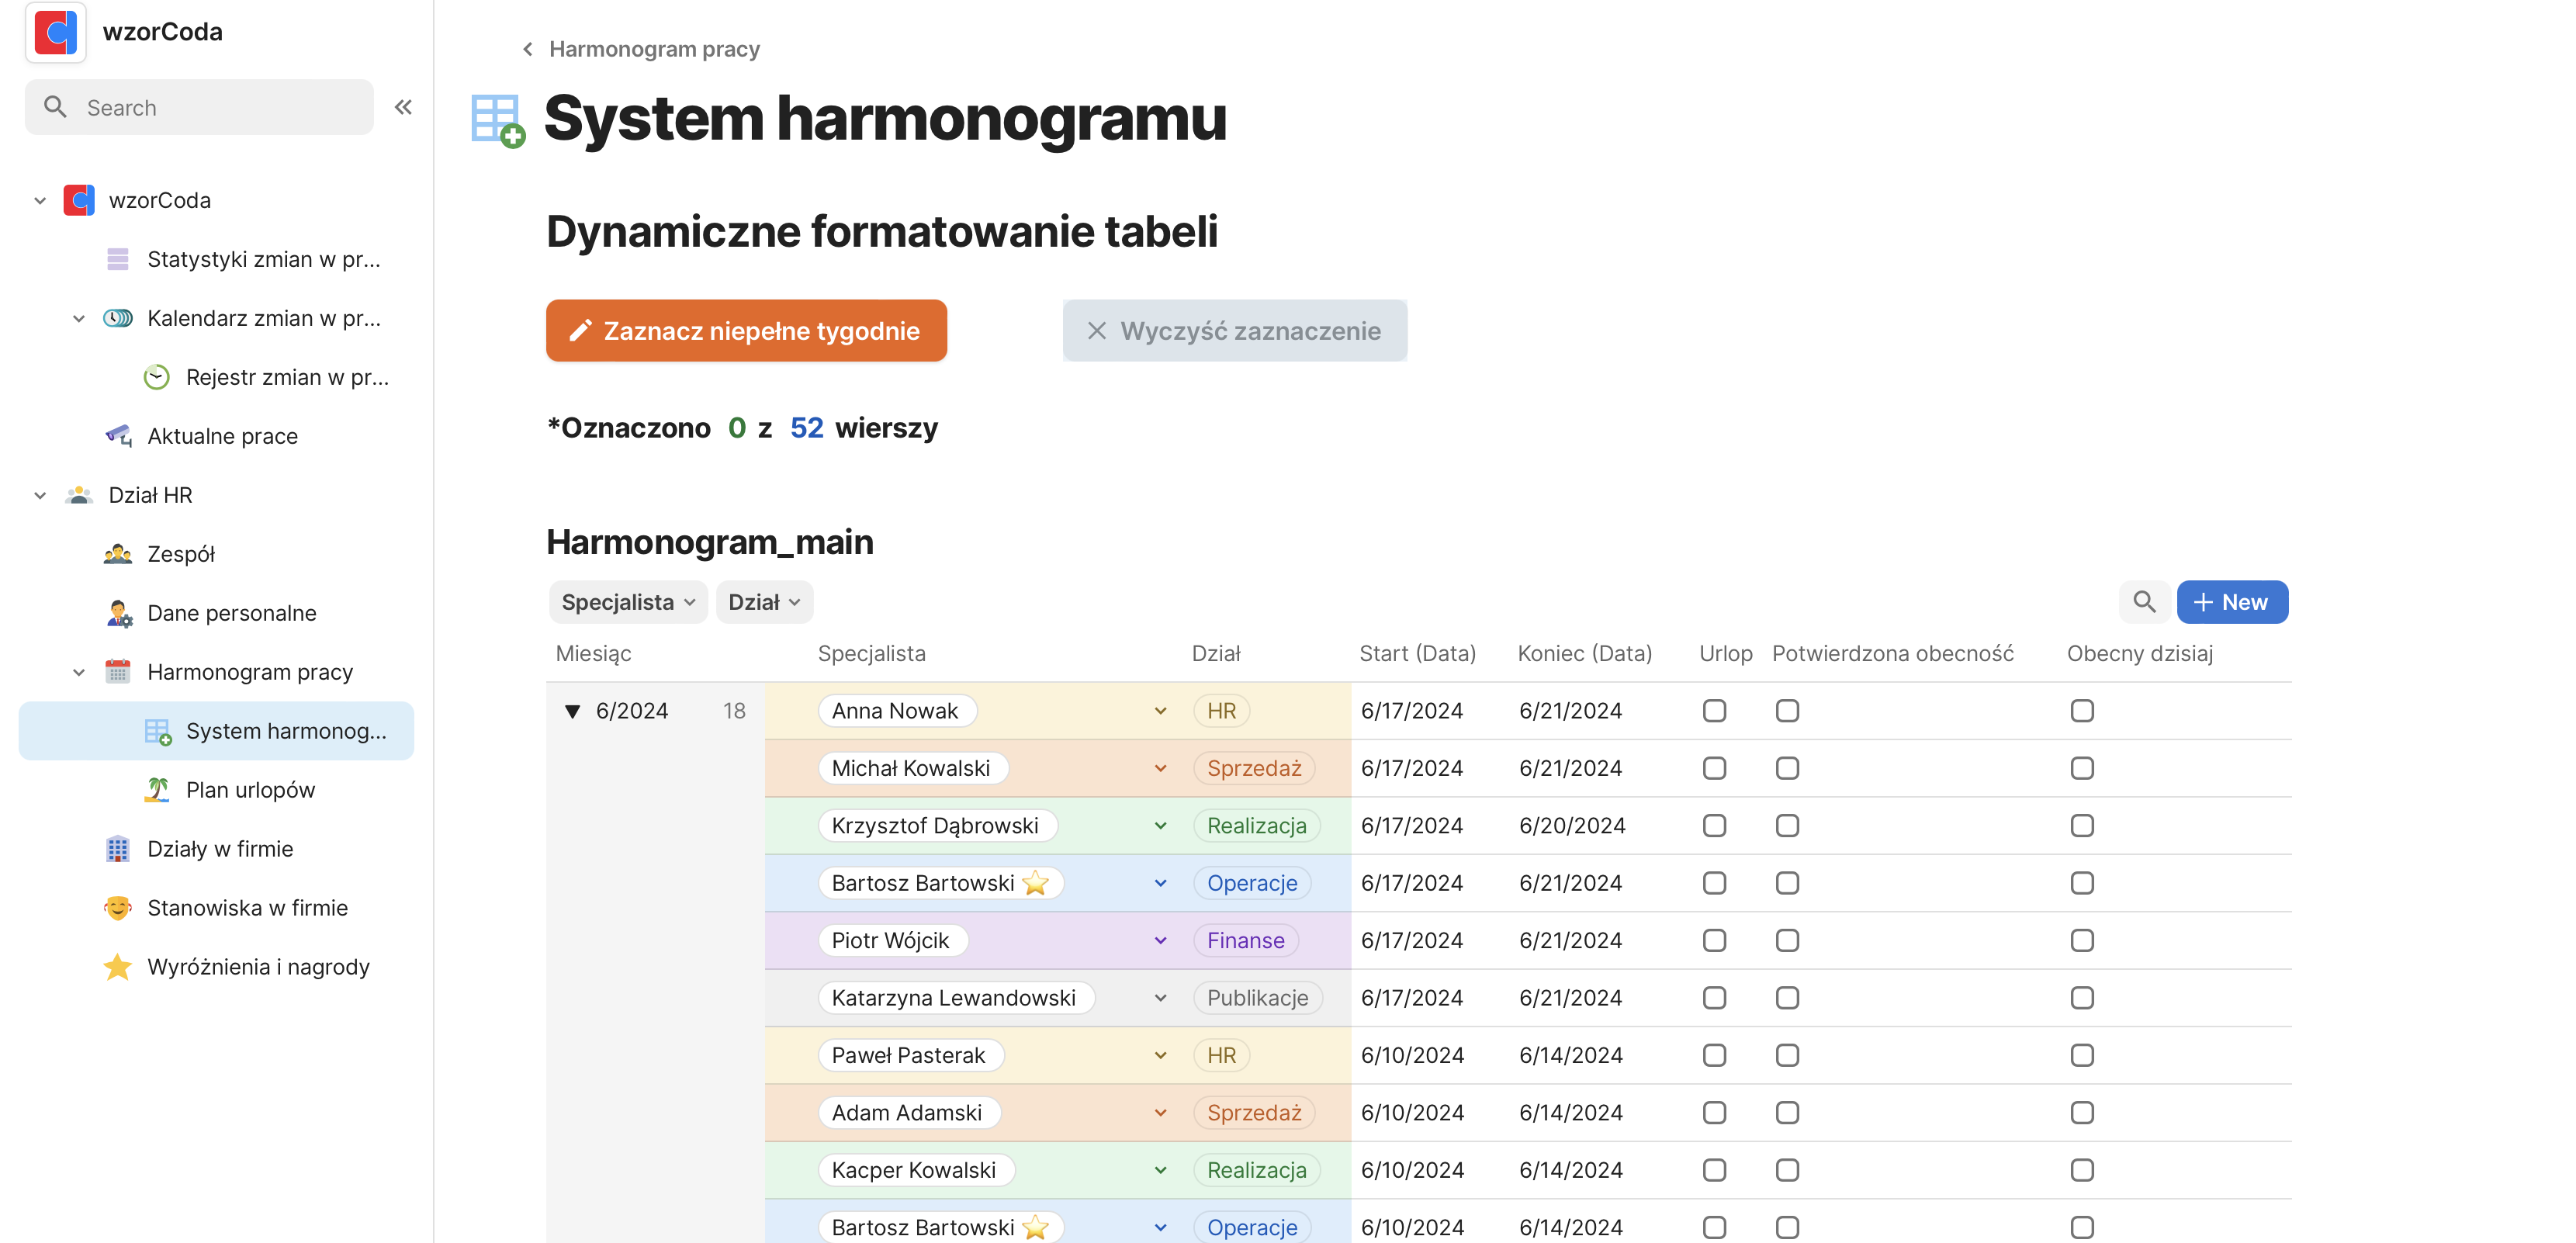
The next table will be a table containing infomation about the team.
The data from this table will be used when displaying statistics, assigning tasks to responsible people and other places where we will refer to people from our team.
In the created document, HR DIVISION, we create a table whose purpose will be to store all the basic information about our colleagues
Another table will be a table containing infomation about the team.
The data from this table will be used when displaying statistics, assigning tasks to responsible people and other places where we will refer to people from our team.
The data from this table will be used when displaying statistics, assigning tasks to responsible people and other places where we will refer to people from our team.
We create a table in the created document HRD, the purpose of which will be to store all the basic information about our colleagues
We name the created table so that in the future it will be easy for us to find it from the list when we refer to the team.
To start, I created 6 columns.
To start, I created 6 columns.
Coda gives us a big choice of what kind of data we will store in a column. The ones we will use most often are: Text, Number, Data, Checkbox.
Below, let’s elaborate on the plans we have for each column:
- Account – PEOPLE column.
By inviting more people to join, we can assign created accounts in coda.io to specific personal data. This will be needed, for example, to perform automatic actions referring to a specific user. - First name and Last name – TEXT type columns.
Standard manually entered text - Department – column of type RELATION.
The division of our organization into departments is advisable due to the later division of responsibilities and access to information by specialists from a particular department. We do not want, each time manually enter the name of the department, so we will create a new table representing the division of our company, and then refer to it. This way, when creating a new account for specialists in the department column, we will have a selection list with an always up-to-date list of departments. - Position – TEXT type column.
For now it will be a manually defined column, but in the future it will also be standardized so that positions in the company also fall under the supervised system - Start of cooperation – column of type DATE.
Information about the time of the start of cooperation is one of the basic data for each specialist.
For People, Text and Date types, the column is ready to accept data. However, in order for the Relation type column to work, it is necessary to create a table that will store the data from which the user will select.
I created a new document “Departments in PMFOR”, and in it I created a table that contains the names of the company’s departments along with a description. I inserted the description to show that the table from which we pull information can also be a functional table storing specific information – we are not limited to one column. I also added a distinctive color for each item, and this color will be visible in all documents.
I created a new document “Departments in PMFOR”, and in it I created a table that contains the names of the company’s departments along with a description. I inserted the description to show that the table from which we pull information can also be a functional table storing specific information – we are not limited to one column. I also added a distinctive color for each item, and this color will be visible in all documents.
Departmental table:
With such a table back in our personnel table, we now have the ability to select a department from those previously defined:
Now all we need to do is to have our colleagues create accounts in coda.io and then access our documents – then we can assign them to specific positions.
As a bonus, we can use the inserted description in a table collecting all departments in the company and present the table in a more accessible form of cards:
We put the team table and defined company departments at the disposal of the HR department.
Before creating places to manage the onBoarding process, let’s slightly modify the table from the last entry.
Let’s start by using the schema with which we created the table with company departments to standardize company positions and then assign them to specialists
Before creating places to manage the onBoarding process, let’s slightly modify the table from the last entry.
Let’s start by using the schema with which we created the table with company departments to standardize company positions and then assign them to specialists
Now I can replace the manually entered position names in the main table with a selection list pulling information about the positions from the created table.
This will make a big difference in the further use of the data and its display: for example, for determining the size of the team in a particular department or position.
Performing the same operations as for the relational connection of the department table, we will get the result as below:
The table prepared in this way will be the basis for us to work on the appearance of team cards in subsequent modifications and to introduce extensive automation.