Introduction
This case study details the implementation of a Coda.io system for Mateusz, the owner of a company that provides electrical installation services for homes, apartments, and businesses. What stands out about Mateusz’s company is its consistent growth in customer base without any investment in marketing or customer acquisition efforts. This growth is primarily driven by word-of-mouth referrals, showcasing the company’s reputation and quality of service. The key focus during the implementation was ensuring a smooth transfer of information from the initial bidding stages to the execution of projects.
Course of Implementation
Stage 1: Business Analysis
Understanding the current state of Mateusz’s business was crucial. The customer service process had never been documented before. Our initial meeting was spent mapping out the customer journey, identifying what information is gathered at each stage, and how it’s utilized further down the line. The process initially looked like this:
- Customer’s First Contact: Usually via phone (99% of the time), leading to arranging the first meeting.
- First Meeting: Held on-site, where installation details are discussed, and a sketch is created.
- Quote Preparation: Based on the sketch, a quote is created.
- Sending the Quote: The quote is sent to the client.
- If Accepted: Dates are arranged for the start and planned completion of the work.
- Preliminary Design of Switchgear: Prepared before work begins.
- Purchase of Materials: Done on the day of implementation from a local wholesaler.
- Implementation: Work is carried out as per the plan.
- Invoicing: An invoice is issued after the completion of work.
A need was identified to change the invoicing process so that the first invoice would be issued before the work began rather than after completion.
At this point, the tools used included Excel, Word, and a notepad, with project information scattered across separate folders on the computer drive. We defined the processes involved in handling new inquiries, preparation, execution, and completion of projects.
Stage 2: Setting Project Expectations
The primary goal of implementing Coda.io was to standardize company processes and prepare for growth and team expansion. We aimed to address the following challenges:
- Time-Consuming Material Preparation: Preparation for purchasing materials was cumbersome.
- Lack of Time Tracking: No records of time spent on projects existed.
- No Co-Worker History: Records were kept in a notebook with no analytics or statistics.
- Lack of Project Analytics: No information on total costs, times, or financial outcomes of projects.
- No Project Schedules: Single implementation dates were no longer sufficient with the increase in projects.
- No Customer Database: A centralized database was needed.
- Manual Report Generation: Statements to the Construction Supervision had to be manually generated.
- Inconsistent Quotes: Lack of standardization in sent quotes led to inefficiencies.
The new tool aimed to learn from ongoing projects and automate work based on the information collected at each service stage.
Stage 3: Tool Structure Design
Based on the customer service processes discussed, we outlined the initial document structure, defining several modules:
- Team: Information about the company team.
- Inquiries/Sales: Information about companies at the quotation stage, including a quotation calculator and inquiry archive.
- Customers: Information about companies that are customers.
- Projects: Details of ongoing projects.
- Accounting: Information about invoices, costs, and profits.
- Processes/Information/Automations: Standardized company processes and instructions.
- Analytics/Work Statistics: Data analysis for drawing conclusions.
After getting approval for this structure, we moved to the next stage.
Stage 4: MVP Creation and Testing
We developed functional documents based on the accepted structure and tested the logic with different scenarios. Some new points emerged, including the need for a “Hourly Realization” project type and switchboard module count information.
Stage 5: Finalization and Handover
After addressing issues from the previous stage, we focused on the visual aspects of the documents. Coda.io is not a graphics program, but we utilized its customization options to make documents easy to navigate. This was important as new administrators would be using these documents.
Final Developed Version:
We provided views linked to online templates, ensuring they were stripped of sensitive data. Key modules include:
- Team Module: Maintains information about associates, essential for generating time-based reports and future automation.
- Inquiries/Sales Module: Manages customer inquiries, with automation for reminders, quote generation, and offer acceptance.
- Customers Module: Centralizes customer information, linking quotes and project details for easy access.
- Projects Module: Manages ongoing projects, tracking schedules, budgets, and task completion.
- Accounting Module: Records business expenses and revenues, updating project cards automatically.
- Processes/Instructions/Automations Module: Standardizes company processes and instructions, supporting team collaboration.
- Analytics/Statistics Module: Automatically gathers data during project execution, enabling analysis and reporting.
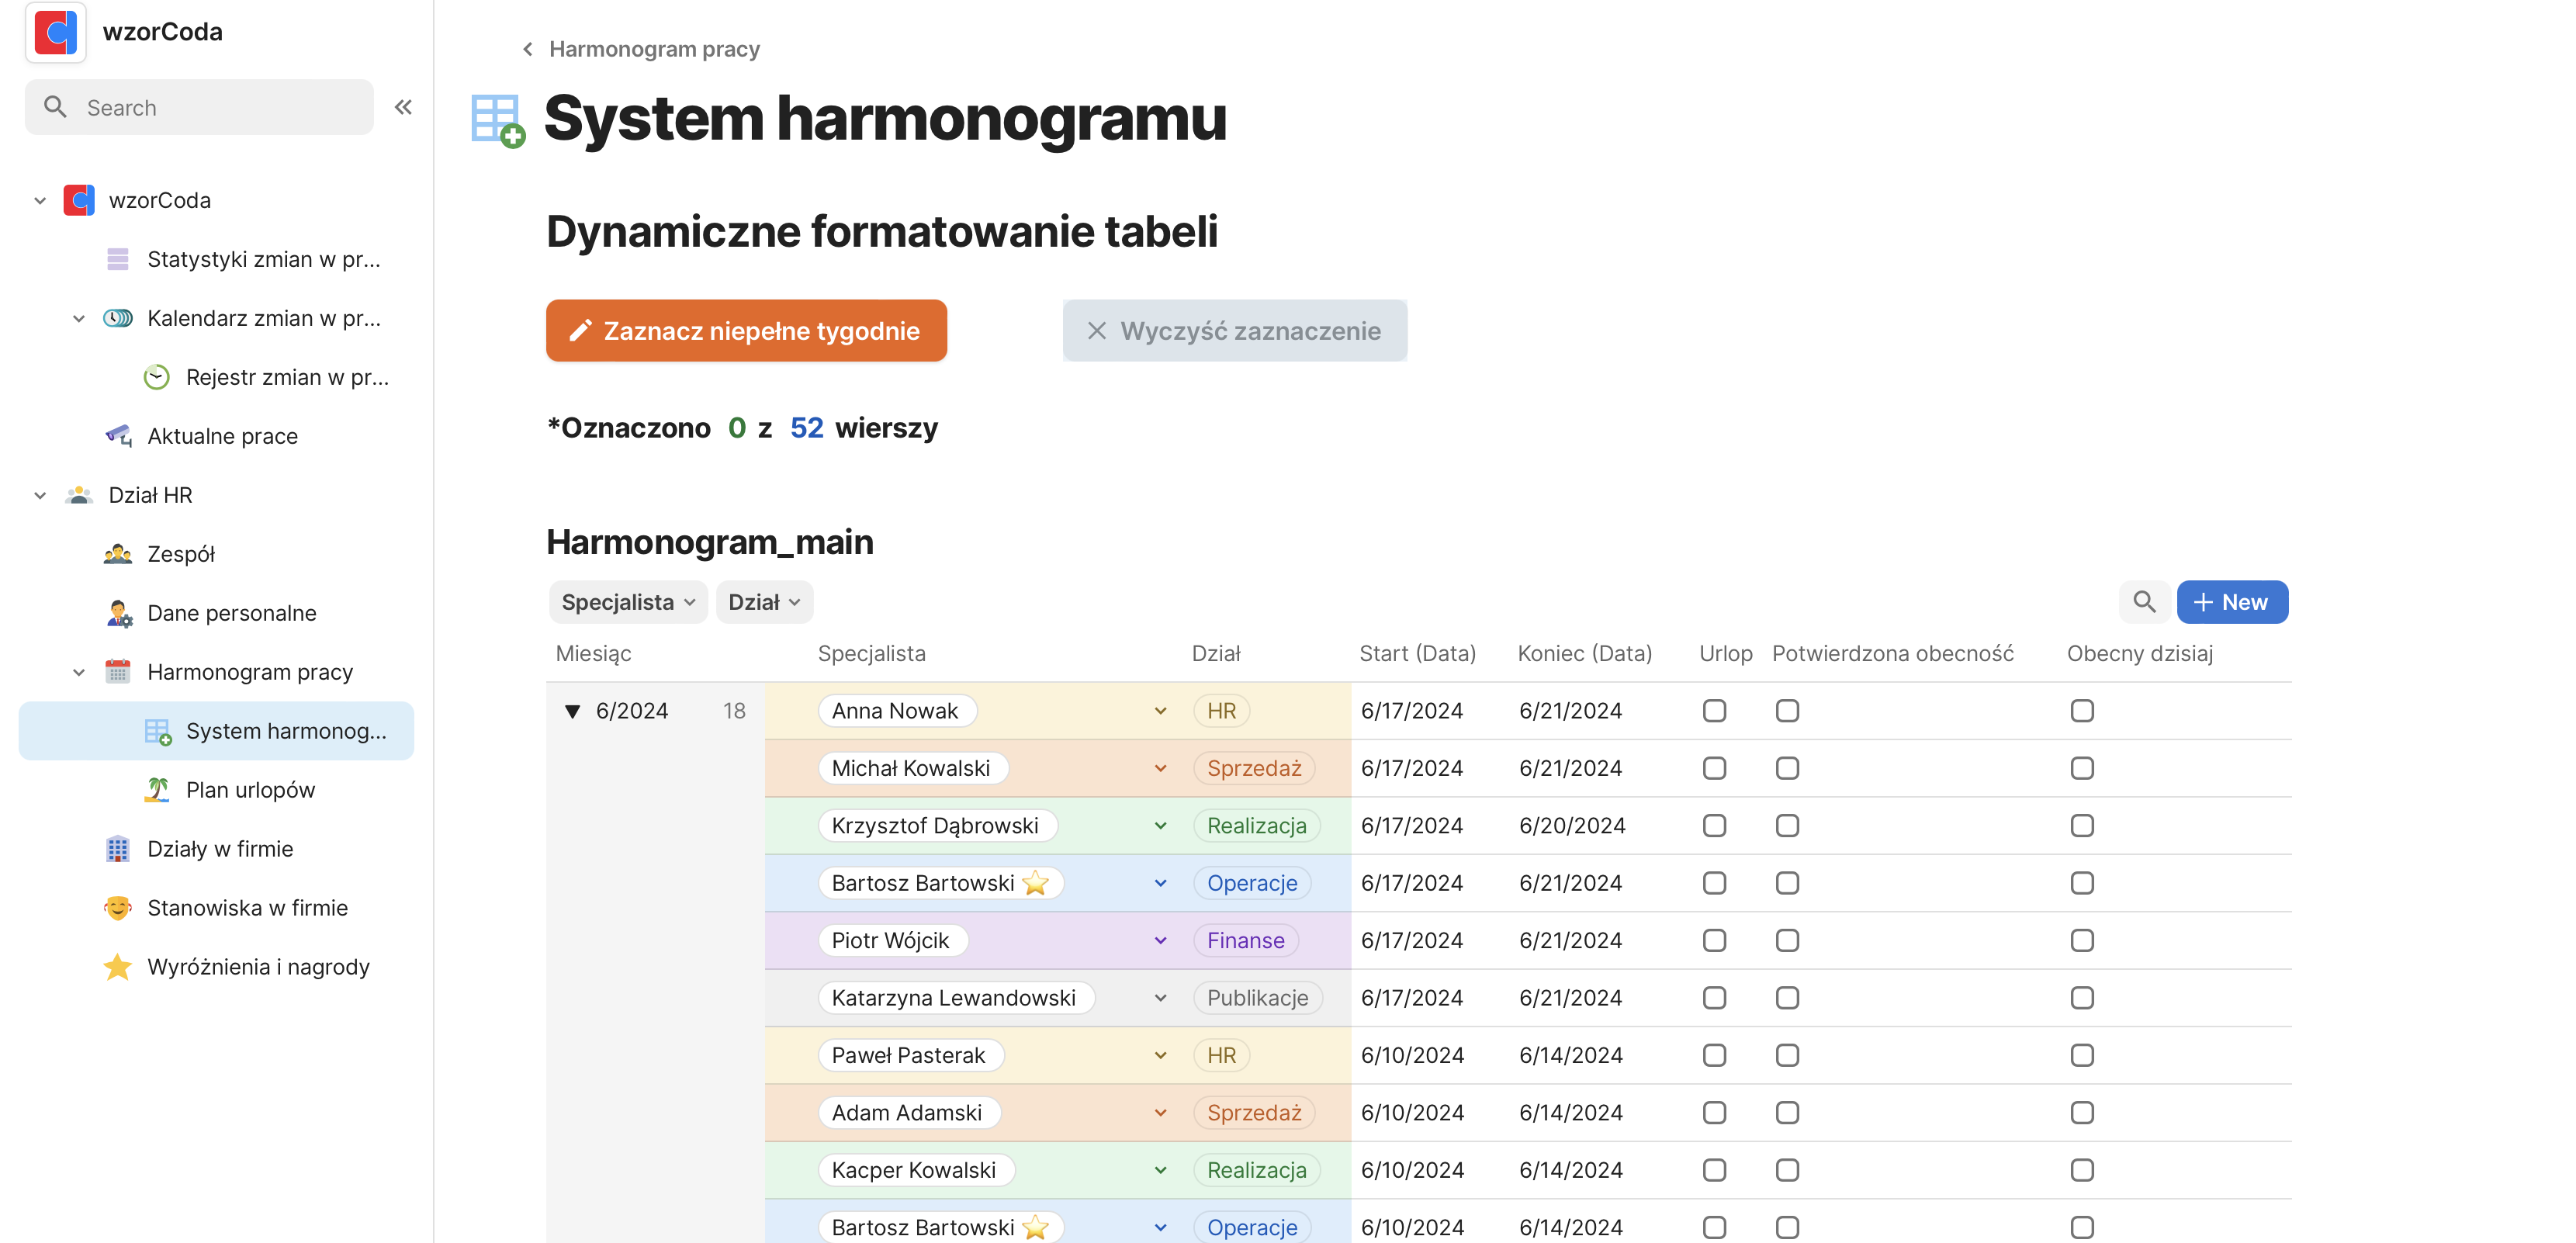
Team module:
Check: https://wzorcoda.com/zespo-68
The company’s team is set to expand significantly over the coming months, which is why I recommend the owner keep all information about their collaborators in one centralized location. Defining each team member is crucial for implementing analytics: one of the goals is to enable time-based report generation for each individual. As the tool evolves in the future, having defined team members will also be valuable for creating new automations.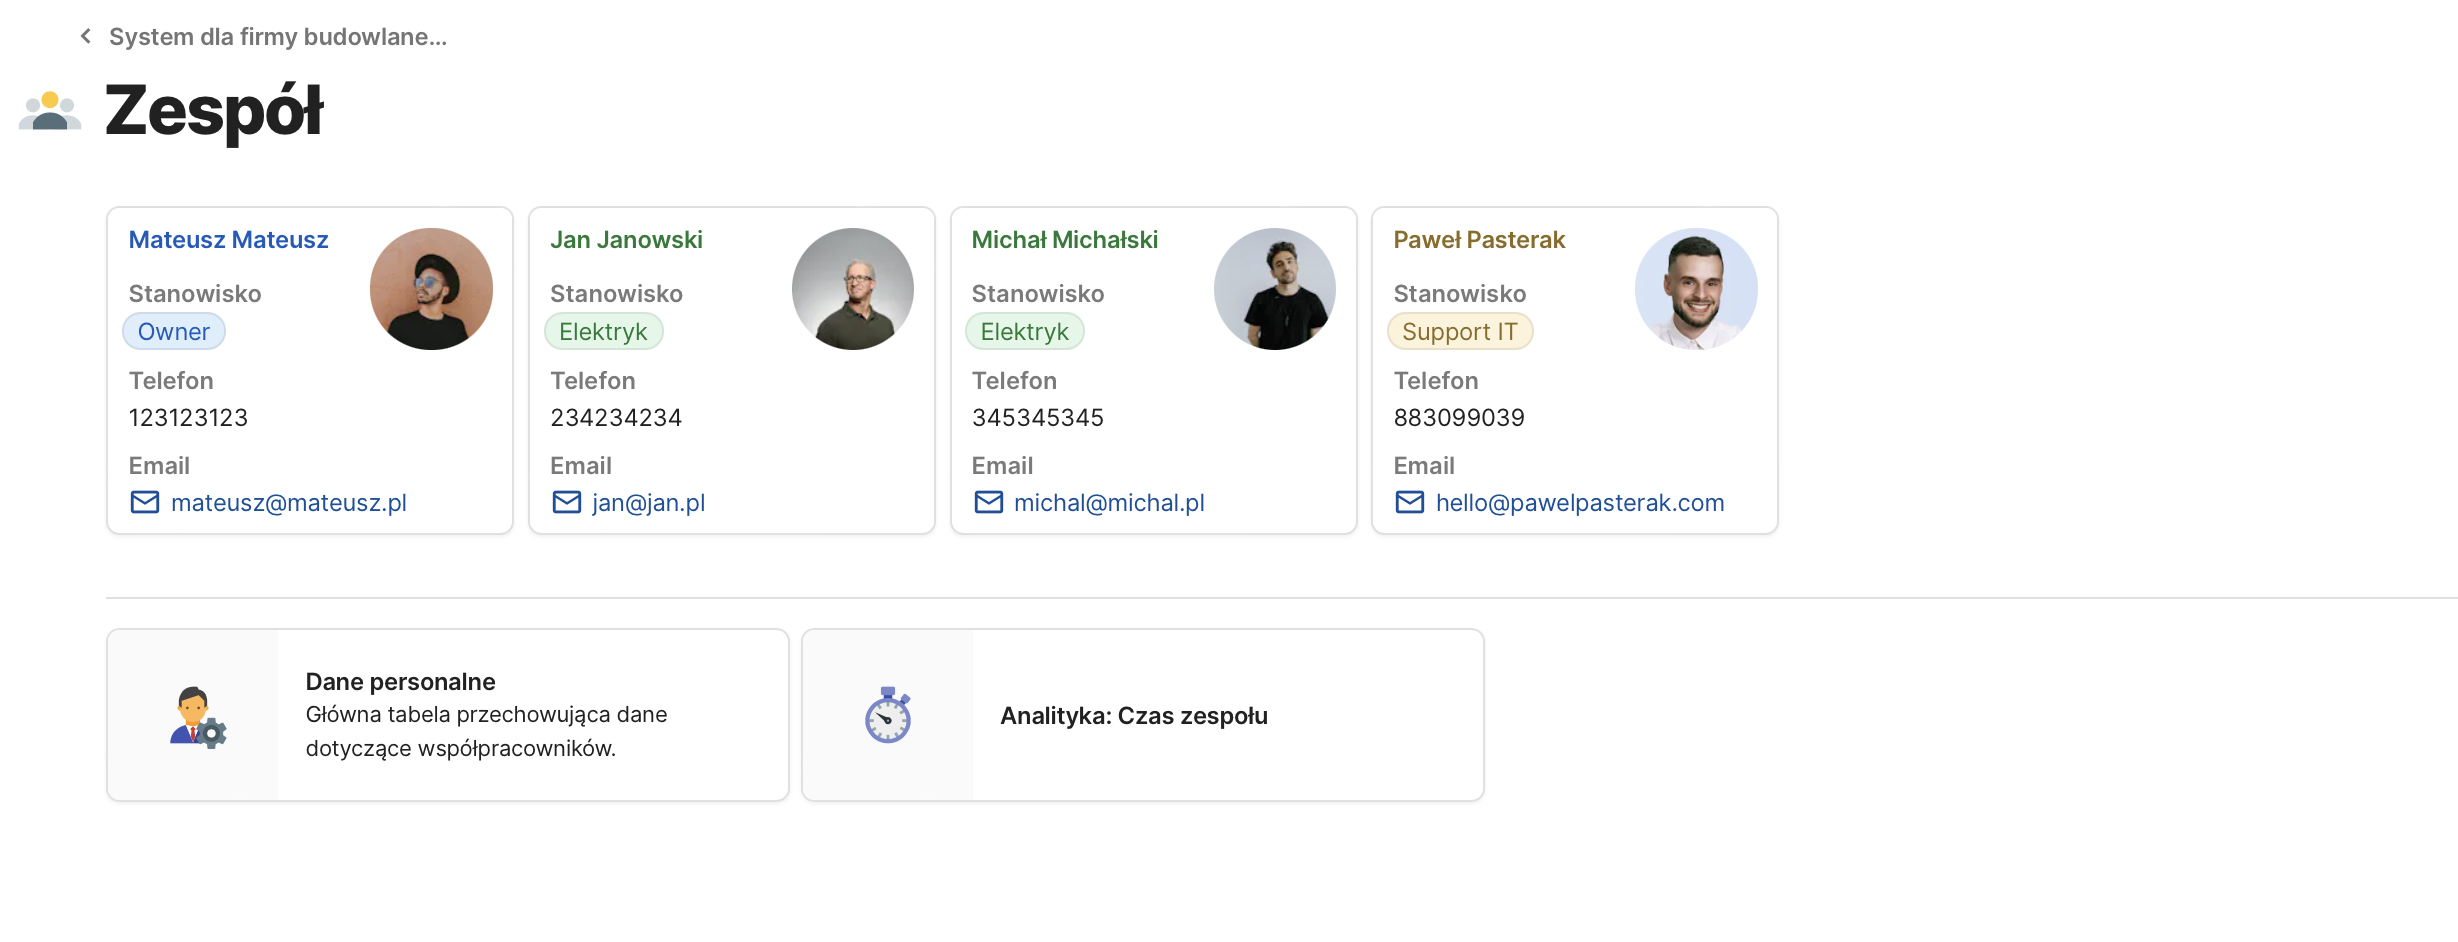
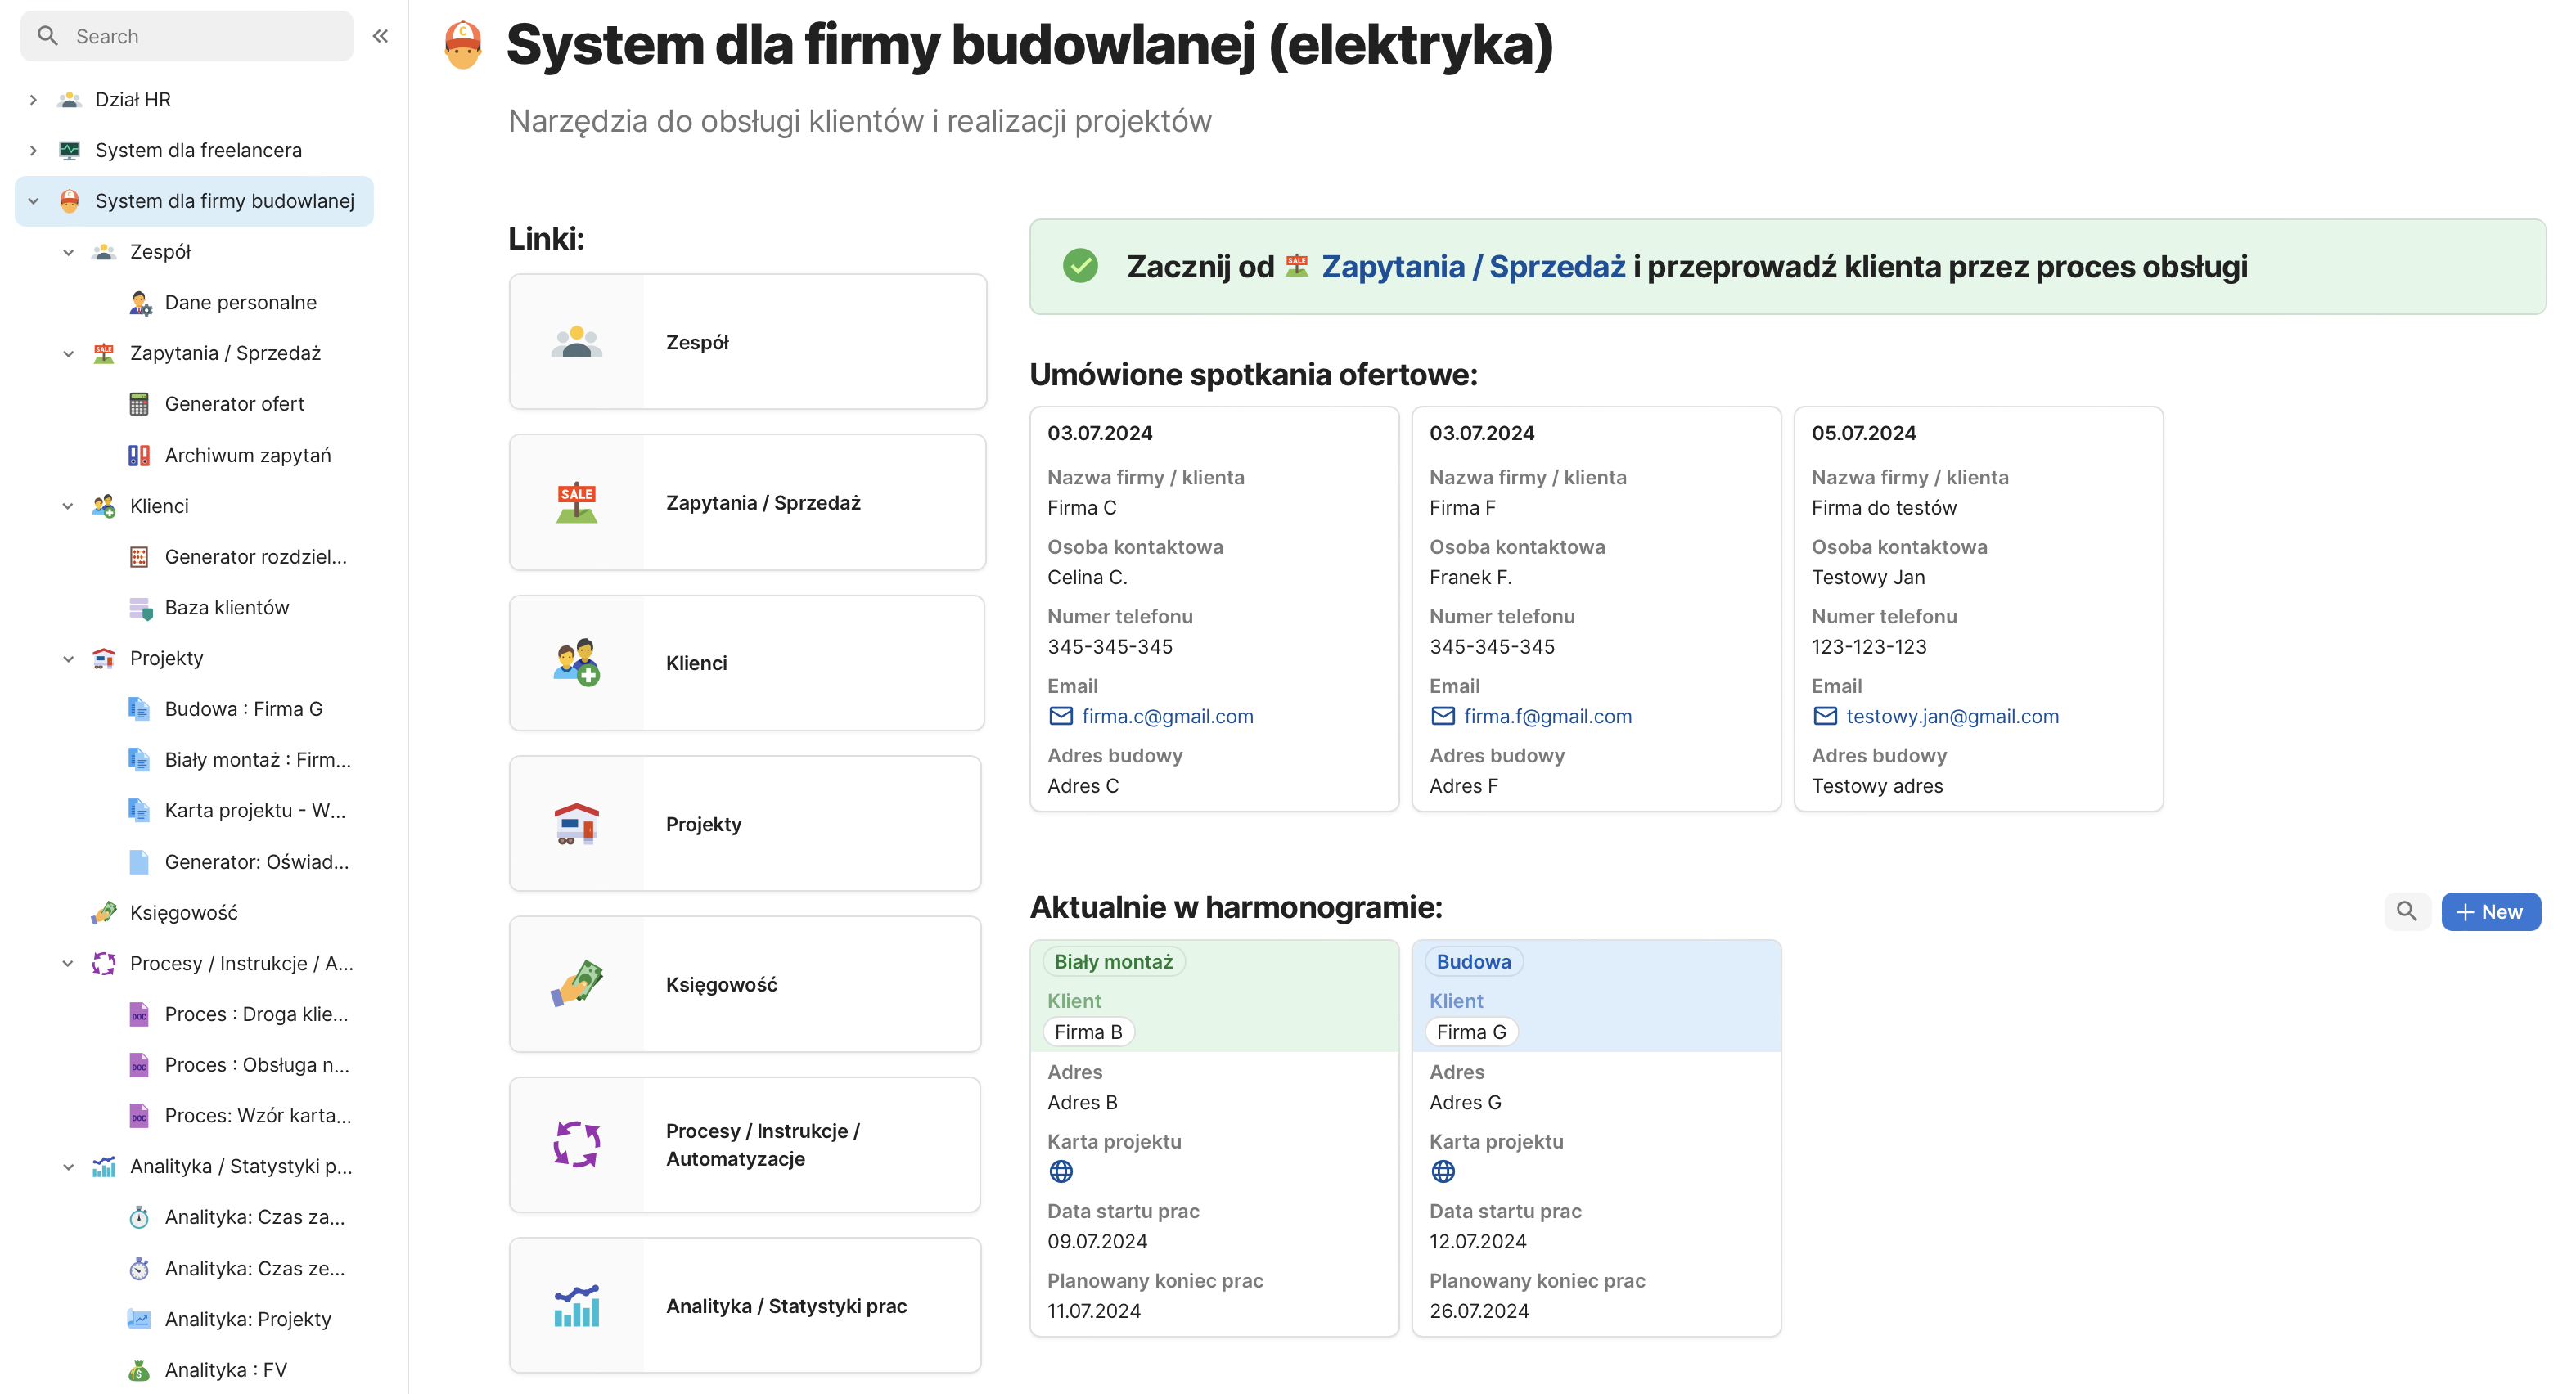
Inquiries / Sales Module
A space where Mateusz will record and manage inquiries. The entry point into this process is the contact from a POTENTIAL client, and the exit point is either the acceptance or rejection of the offer. All the information necessary for creating a quote is defined here, and the quote itself is saved both in PDF format and in a format that allows for future retrieval if the project is undertaken.
Automations in this document include:
– Reminders for upcoming scheduled meetings to create a work sketch (on-site).
– Automated email sending with the offer “at the click of a button” → with the option to manually set the date and send the email manually if a custom message is needed.
– Reminders if there is no response to the sent offer within 3 days.
– Automatic assignment of data from the completed quote to the respective inquiry for later retrieval.
– Automatic transfer of information from the inquiry stage in case the offer is accepted OR rejected.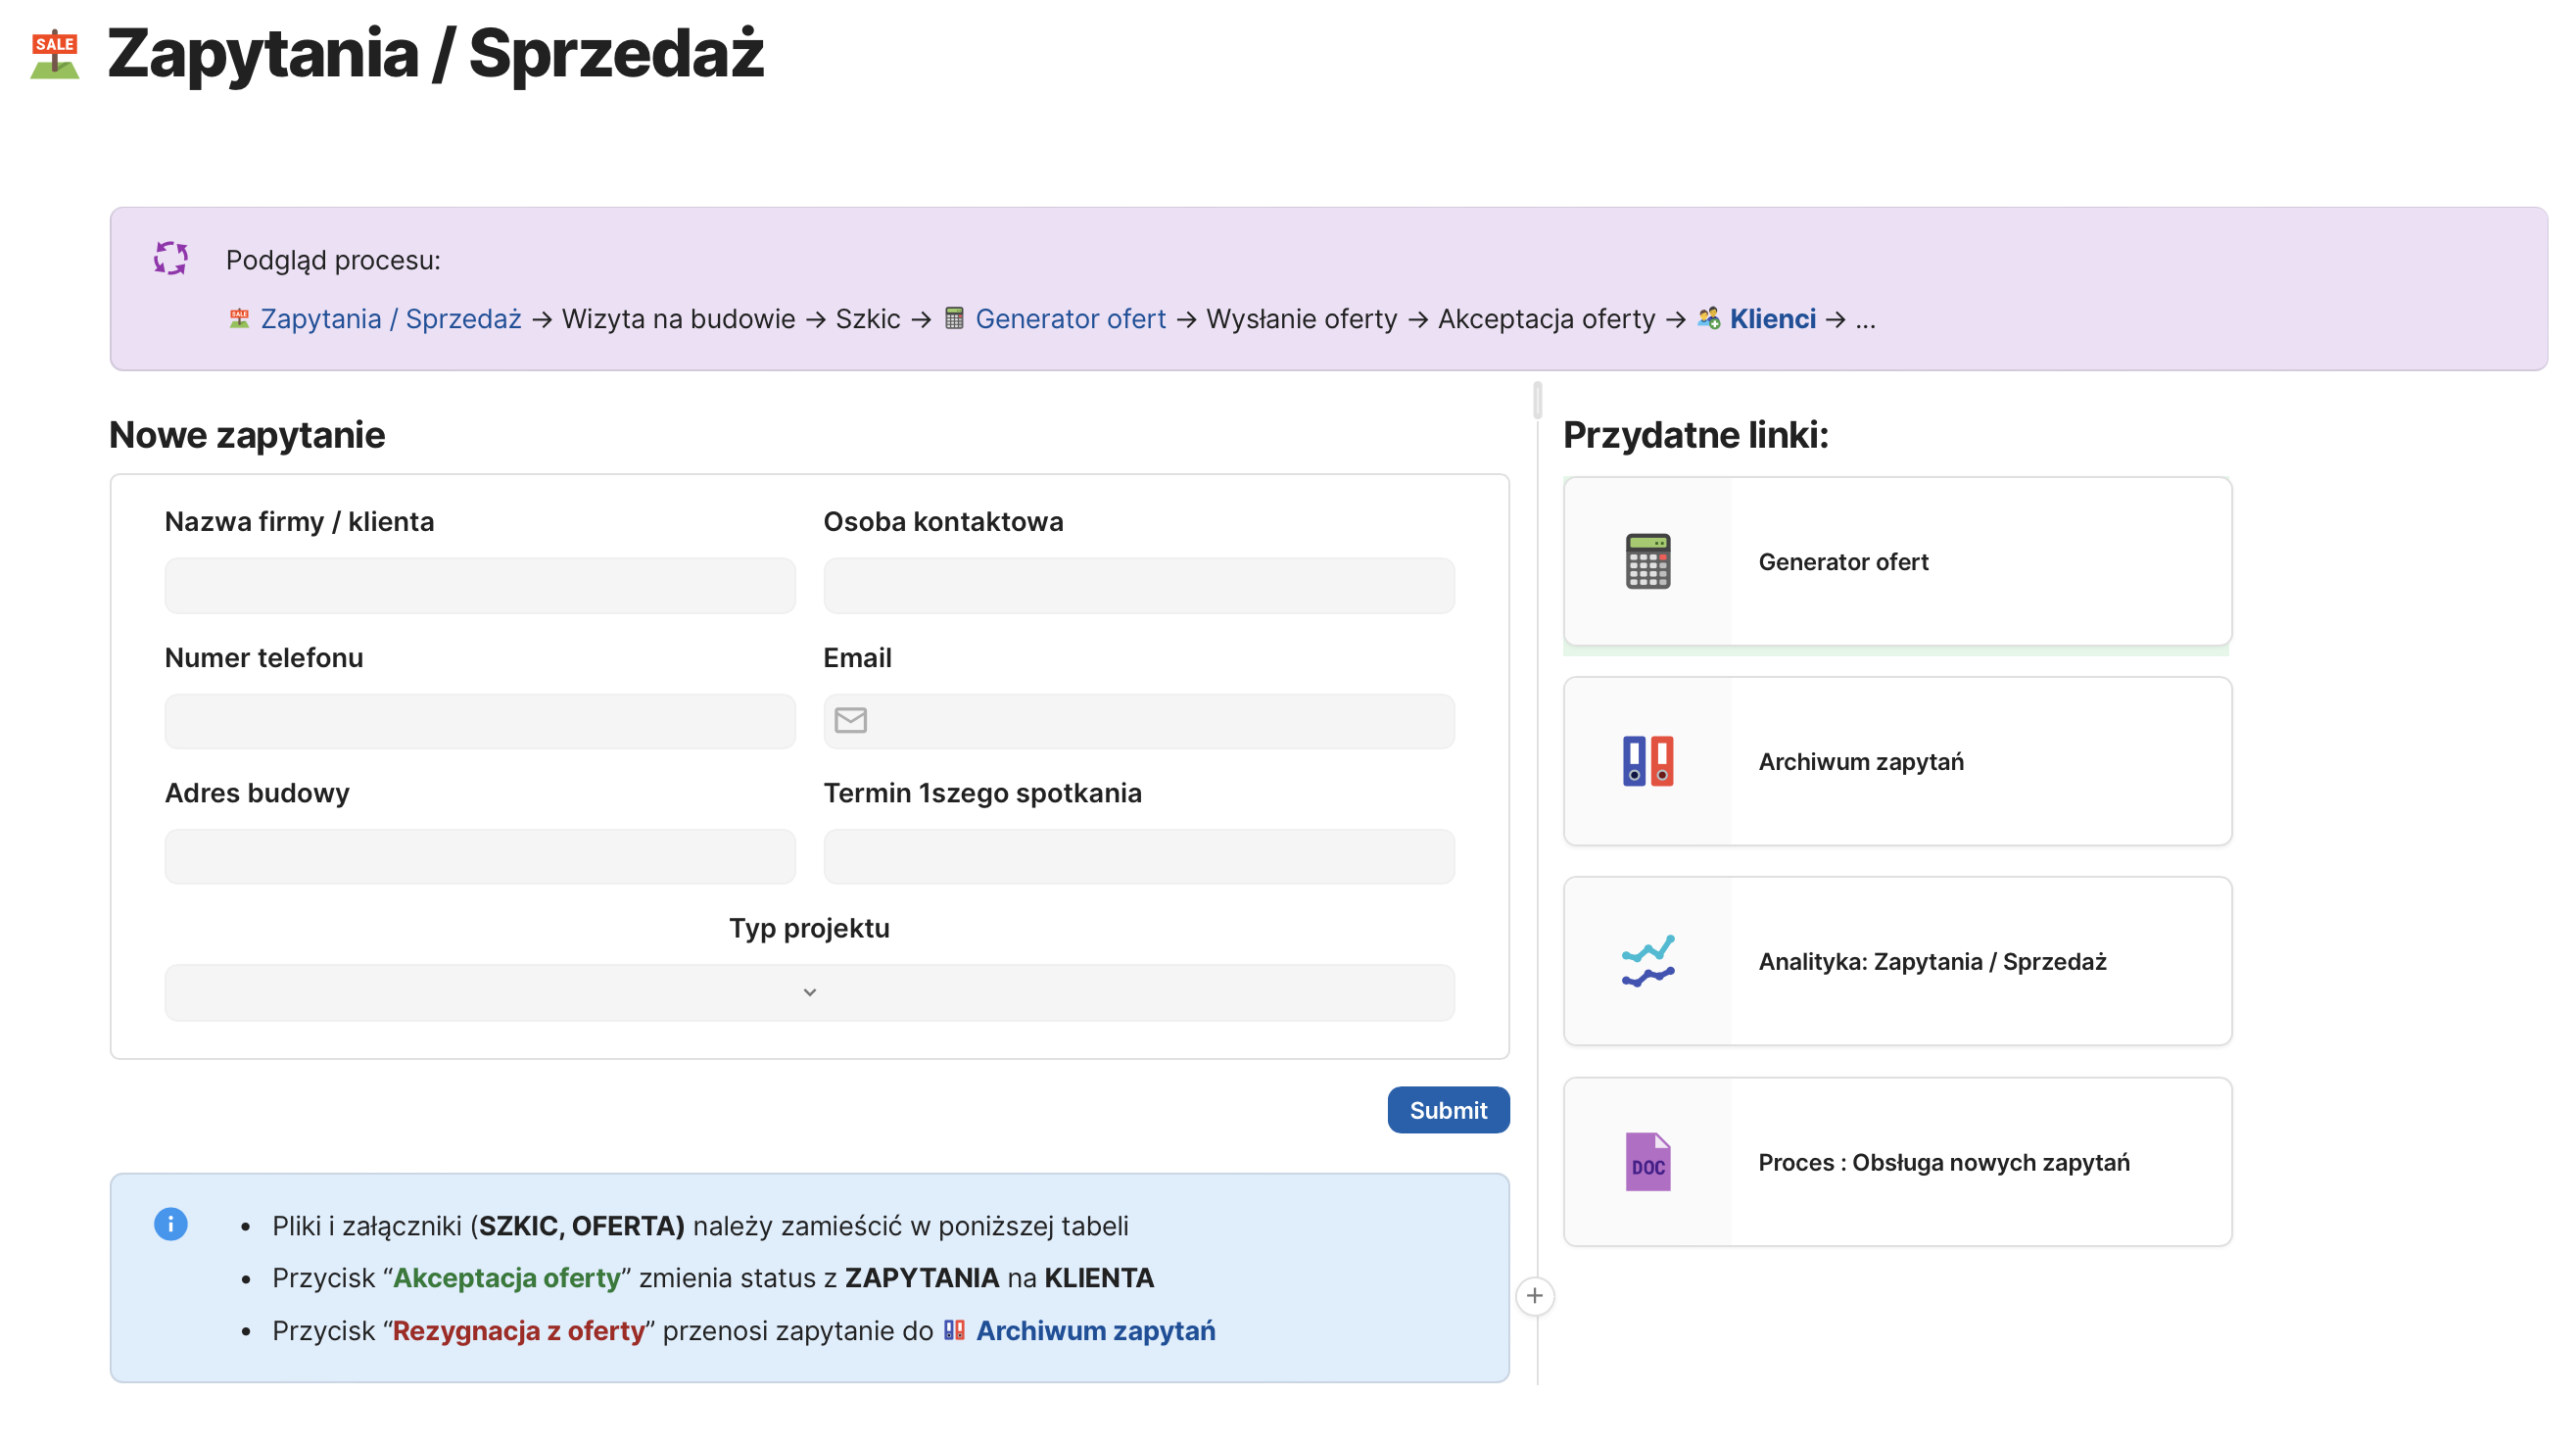
An important view is the “OFFER GENERATOR,” which contains three buttons:
1. Clear Table: Automatically clears the quantity of items from the previous estimate. One of the key features is that the previous estimate is available by default, as new quotes are often created by editing a previous one.
2. Hide Empty Rows: The “quote calculator” and “equipment to order” tables serve as the database for all possible items that can be included in the estimate. By using this button, rows not included in the estimate are hidden from the tables.
3. Save Quote: All items from the table are assigned to the client for whom the quote was prepared.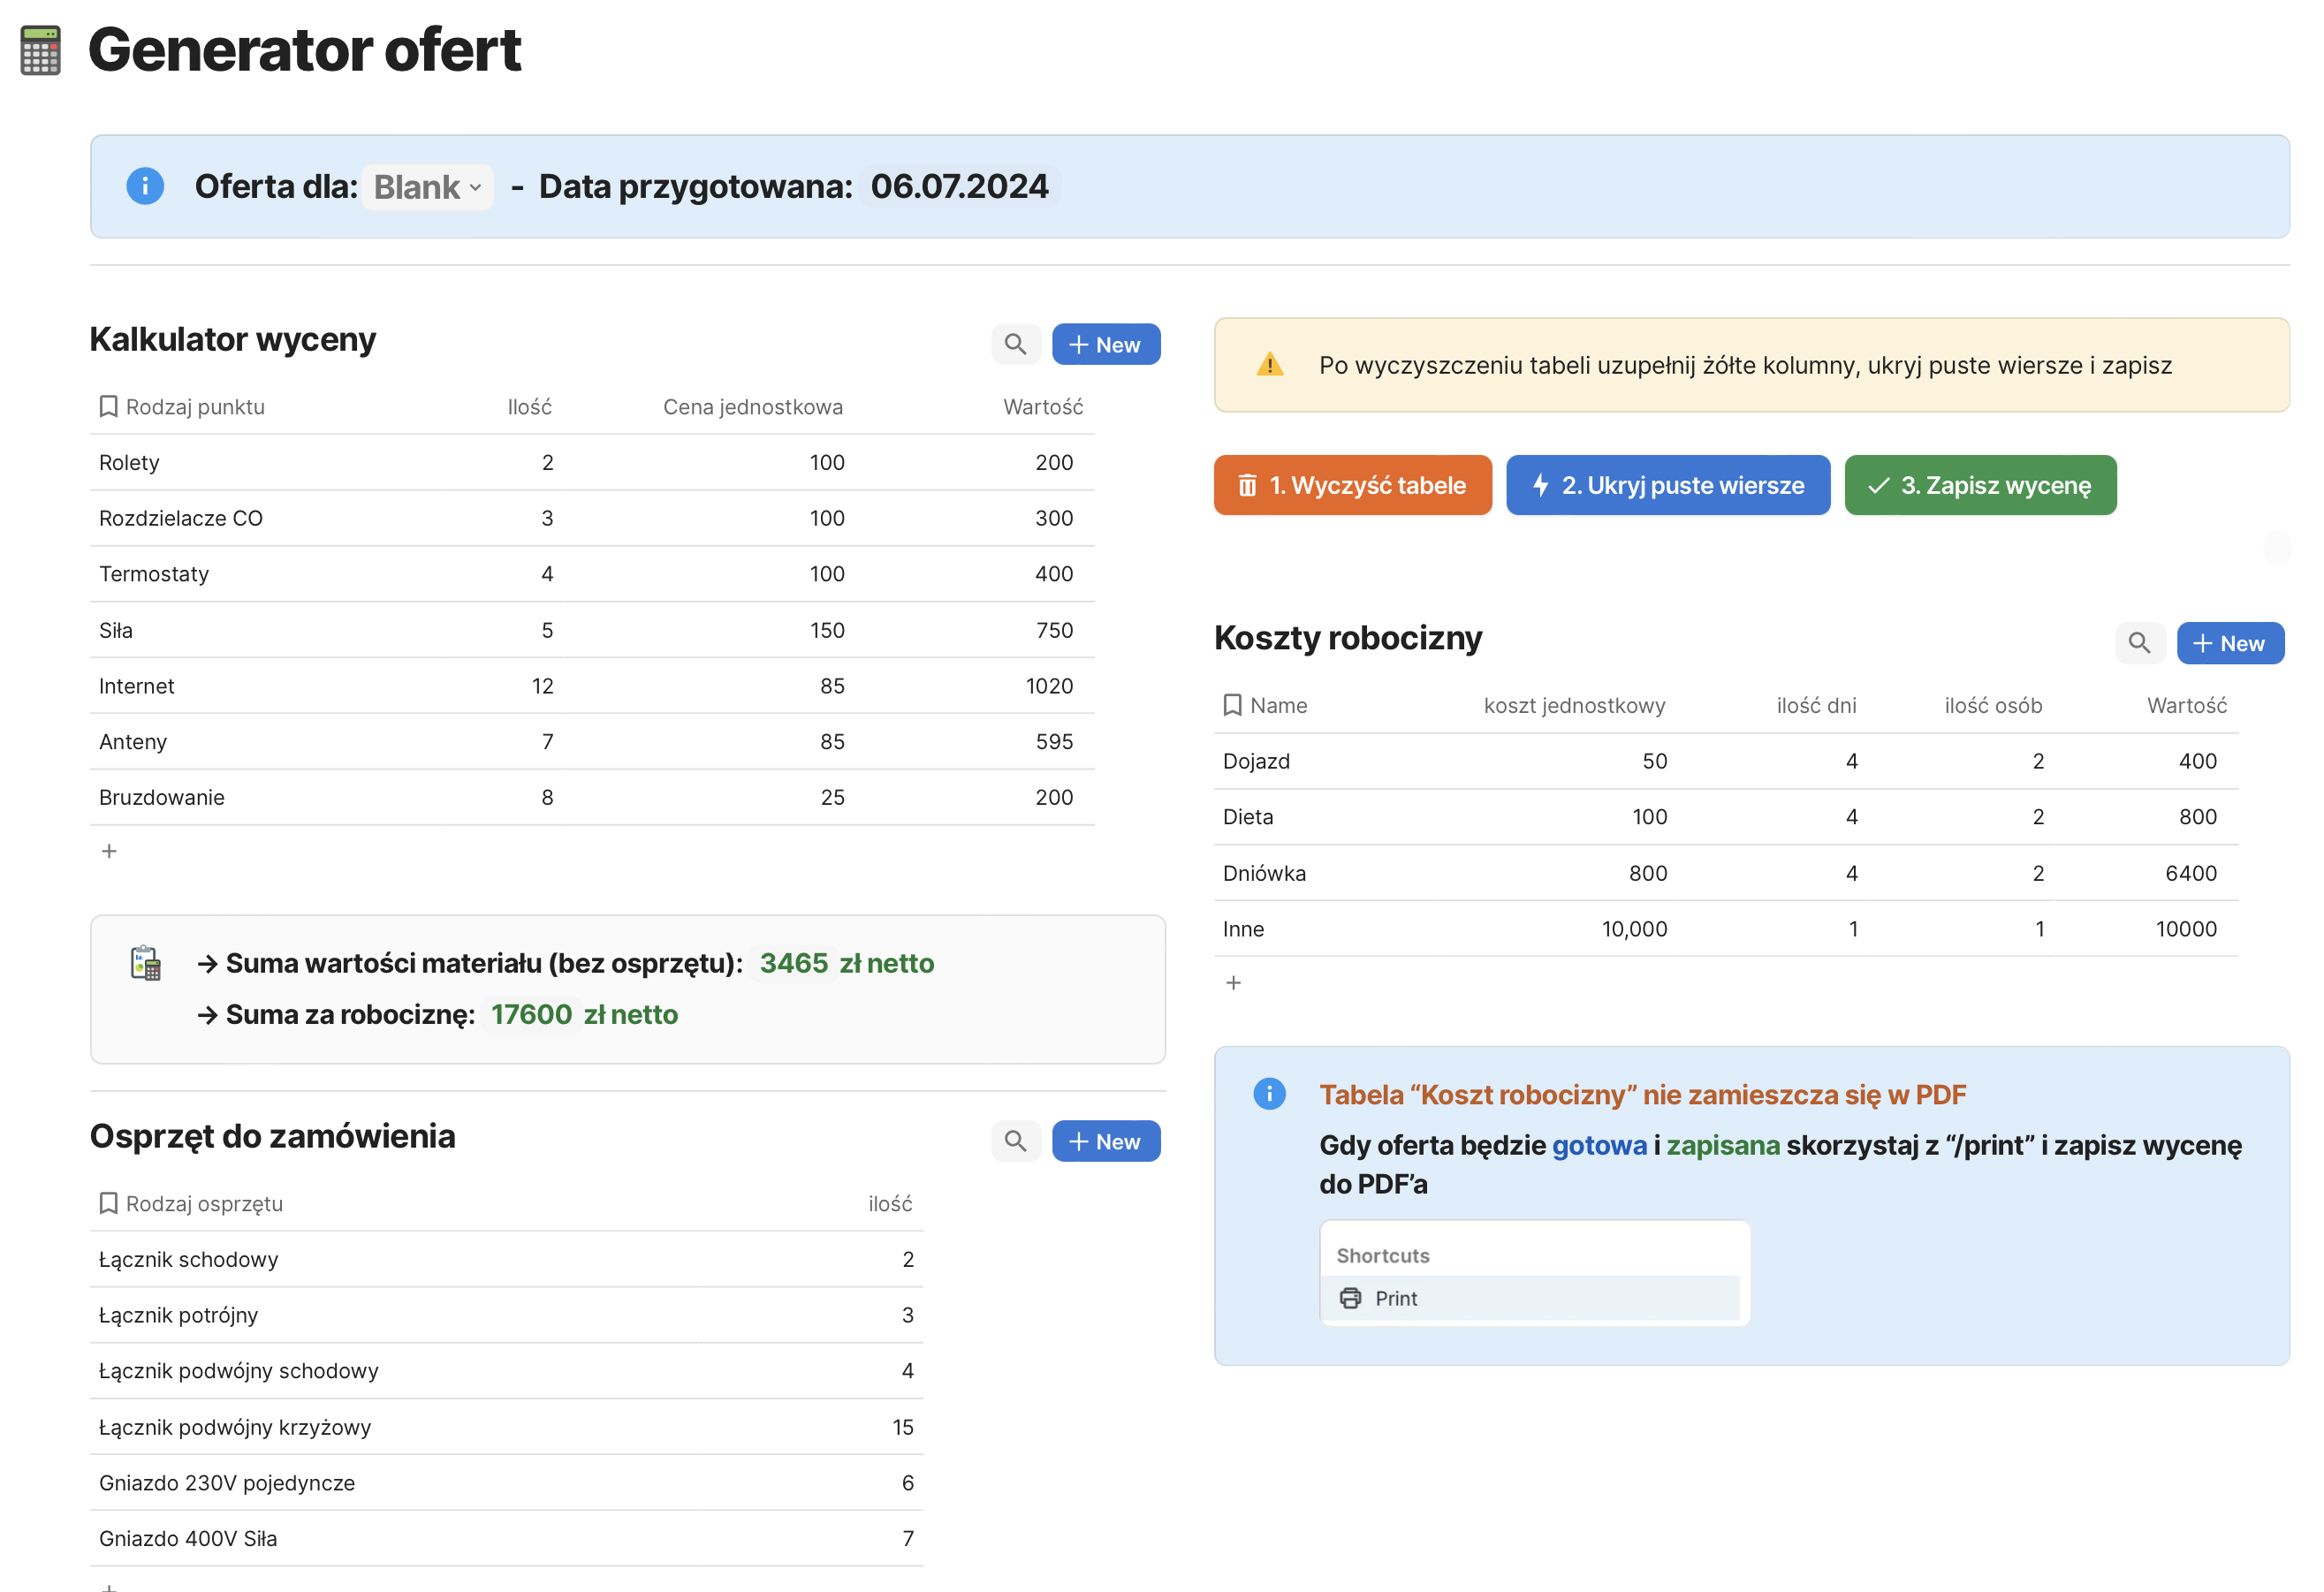
Each inquiry is displayed on a separate card, allowing for an easy overview of the current status of the inquiry.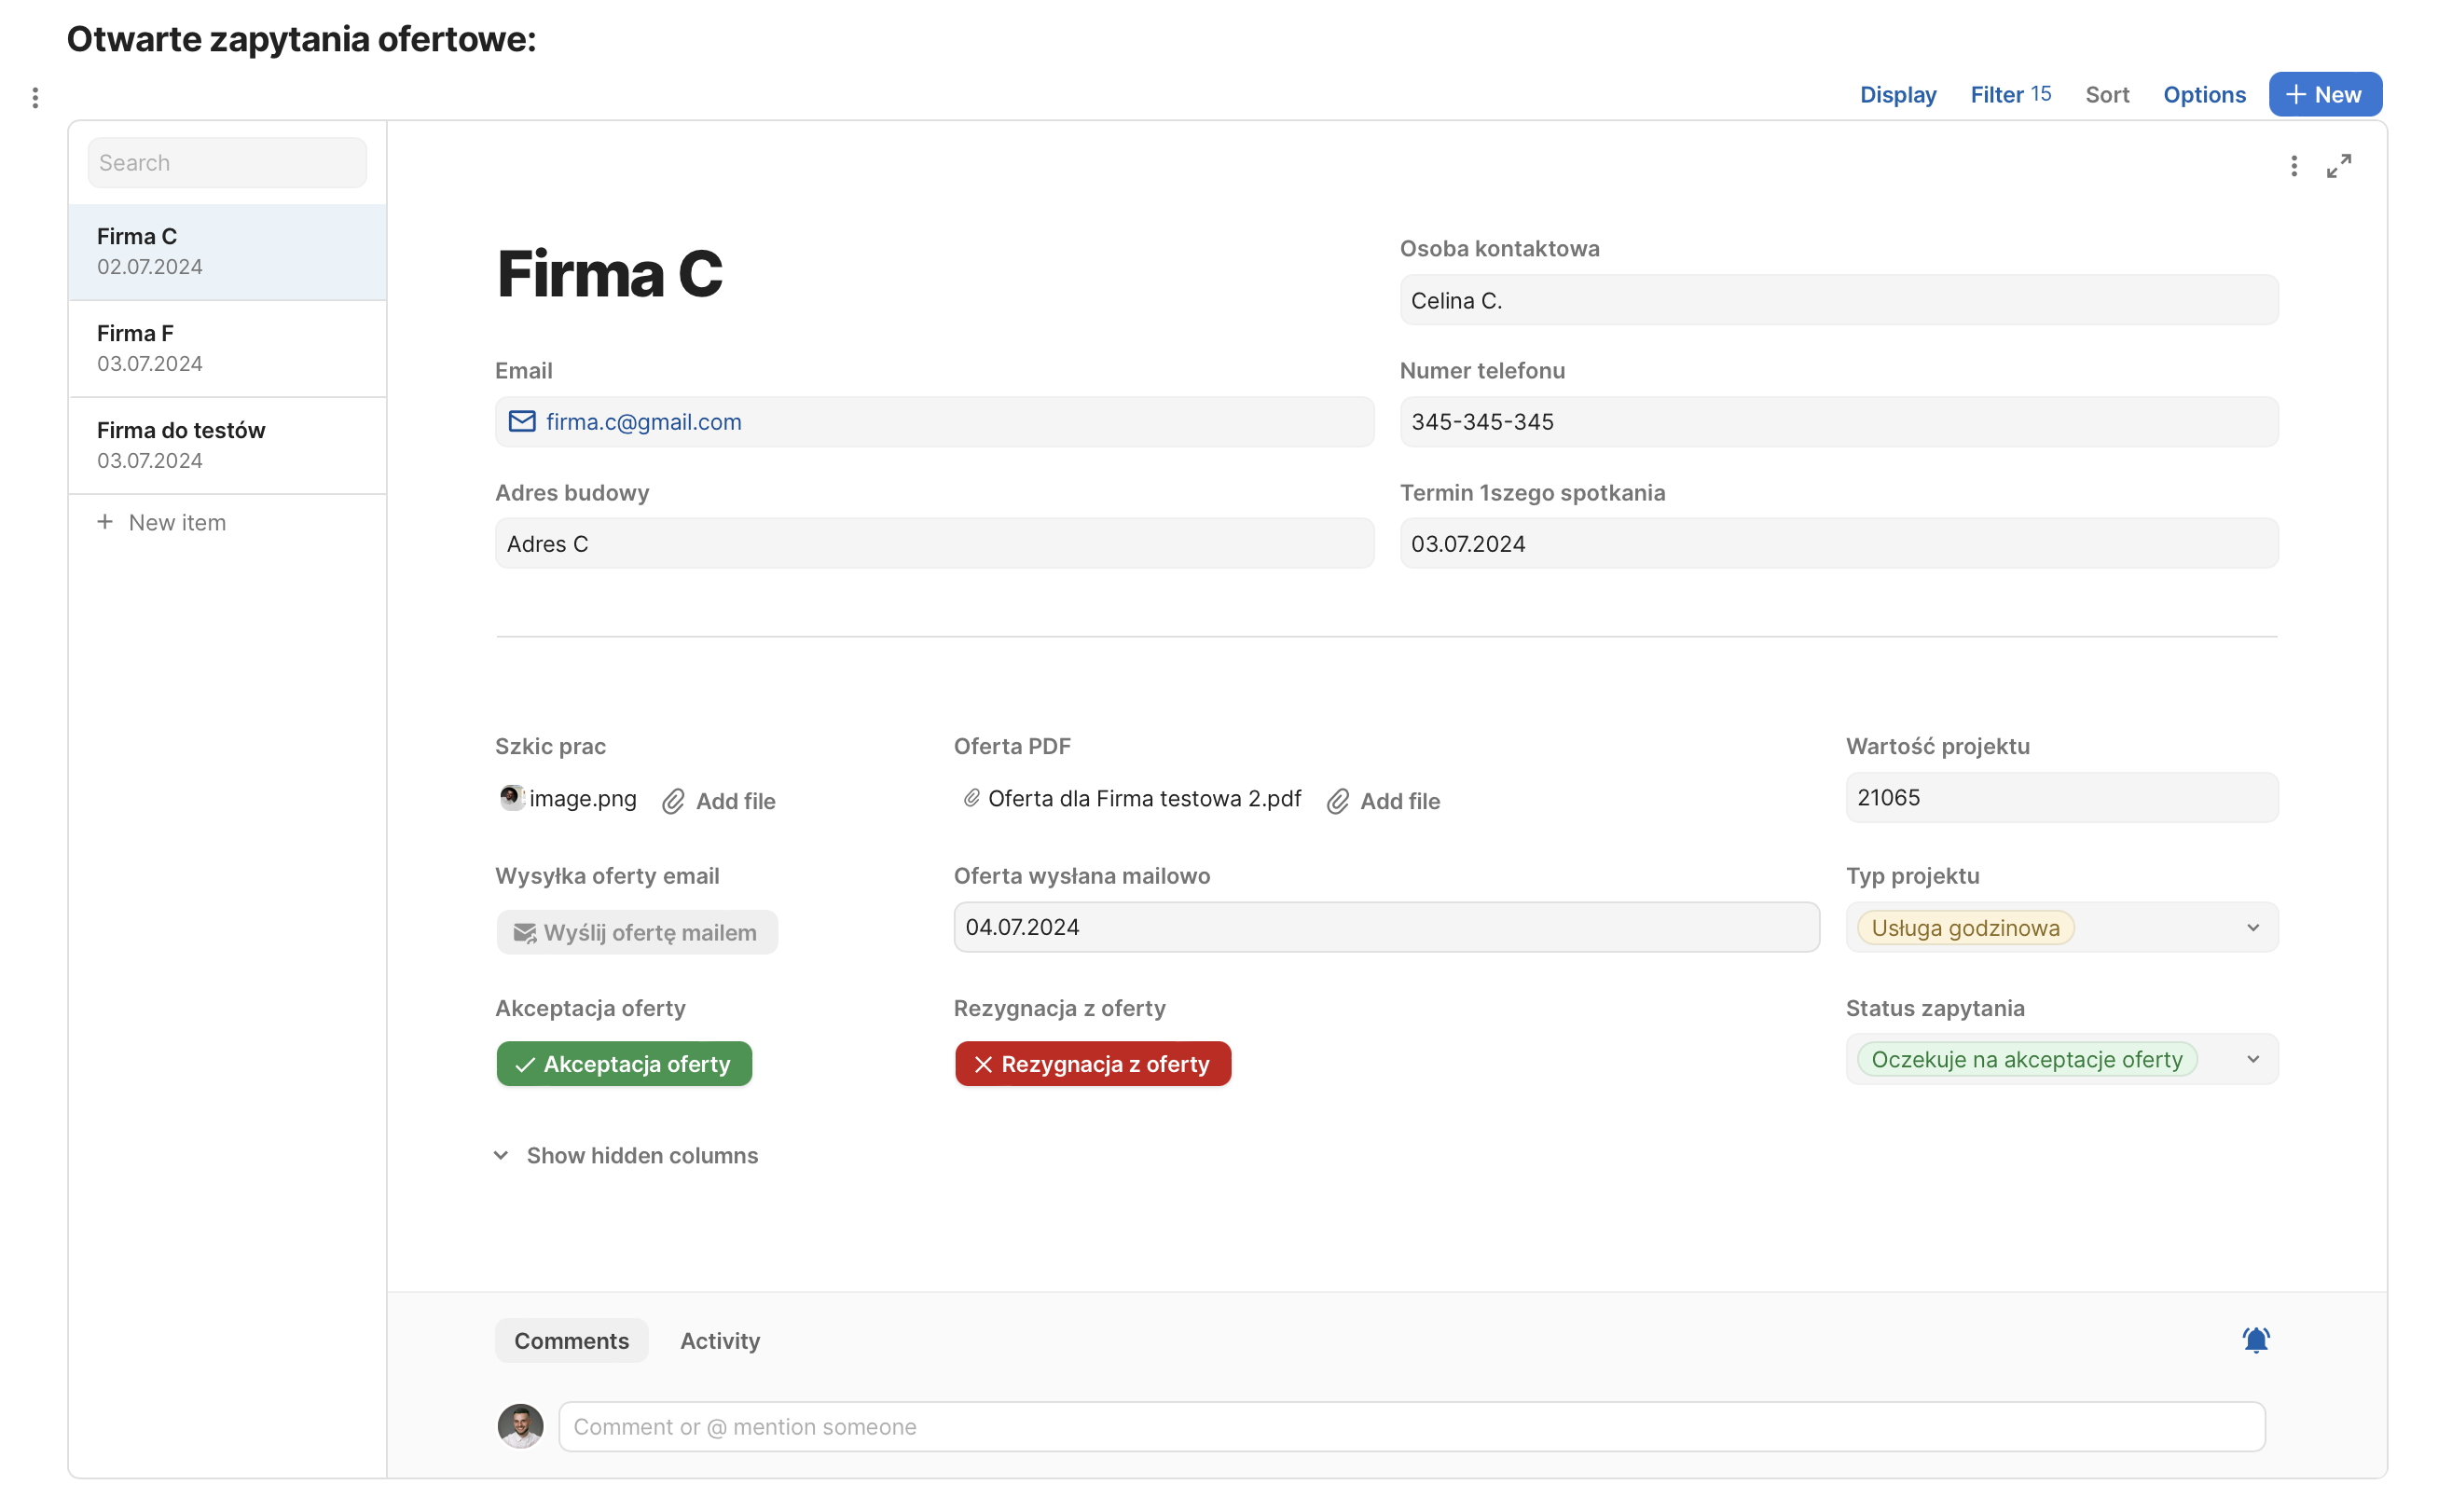
Customers Module
Check: https://wzorcoda.com/klienci-73
This module includes all companies linked to accepted offers, providing a simple view of firms currently being serviced. Once an offer is accepted, Mateusz must create a switchboard plan; therefore, newly registered clients in this table have two statuses: “Preparing for Implementation” or “In Progress.”
Since the switchboard is based on information contained in the quote, I linked the quote on this subpage for easy access. Previously, it was necessary to search through emails to find the message sent to the client with the offer. Once the switchboard is prepared and saved, it is assigned to the client, allowing for future retrieval of information about what has been planned.
Additionally, the preparation of the switchboard triggers several automatic events:
– It changes the implementation status to “In Progress.”
– It moves the item to the projects tab, where key information for project execution is visible.
– In the accounting tab, it creates a new entry notifying the need for issuing the first invoice (before work begins).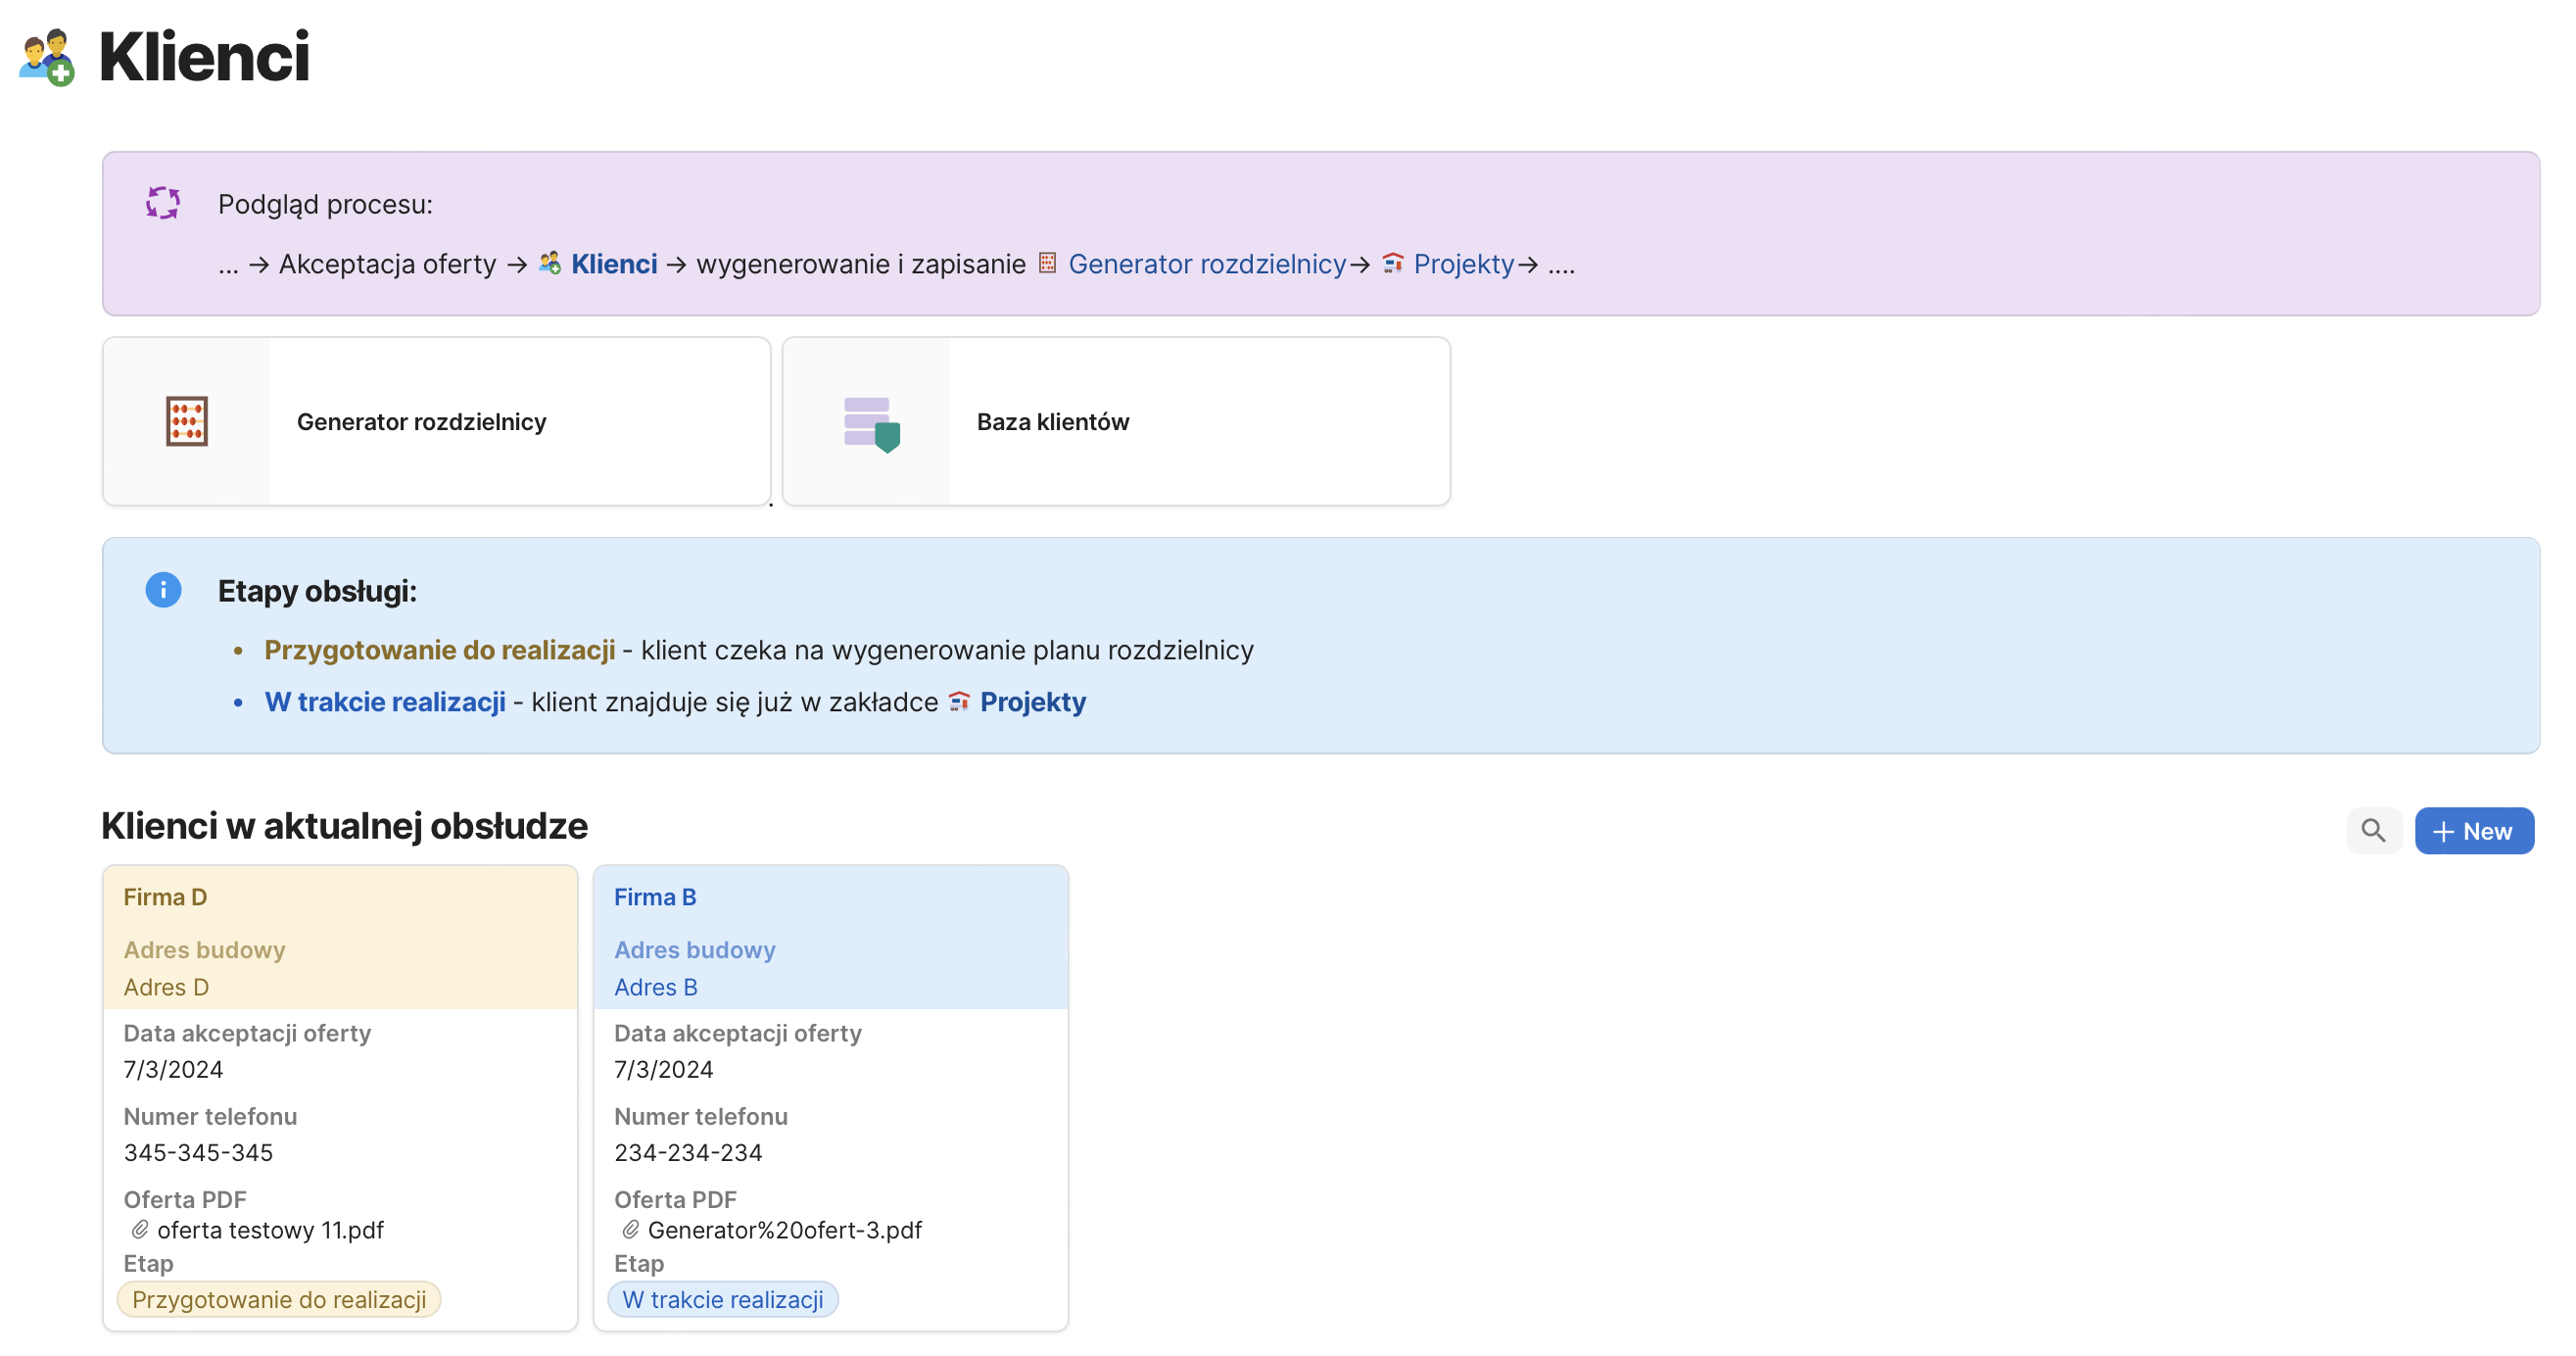
Projects Module
Check: https://wzorcoda.com/projekty-76
This view displays all ongoing projects along with their implementation schedules. It assists in planning dates for new projects and provides a clear table to check the payment status of invoices for each client, as well as the financial outcome of the implementation.
Each project has its own project card view: Mateusz wanted to maintain separate cards for each project, and the tool was designed accordingly. However, it is also possible for the project card to be dynamic, updating its data based on the selected project.
The project card contains all relevant information about the project, updated from other documents within the entire structure. It provides an overview of implementation deadlines, data from the bidding phase, switchboard planning, and a budget overview, including currently registered cost invoices. Additionally, it indicates whether the first invoice has been paid, lists the cost invoices, and includes a comprehensive list of tasks to be carried out as part of the project.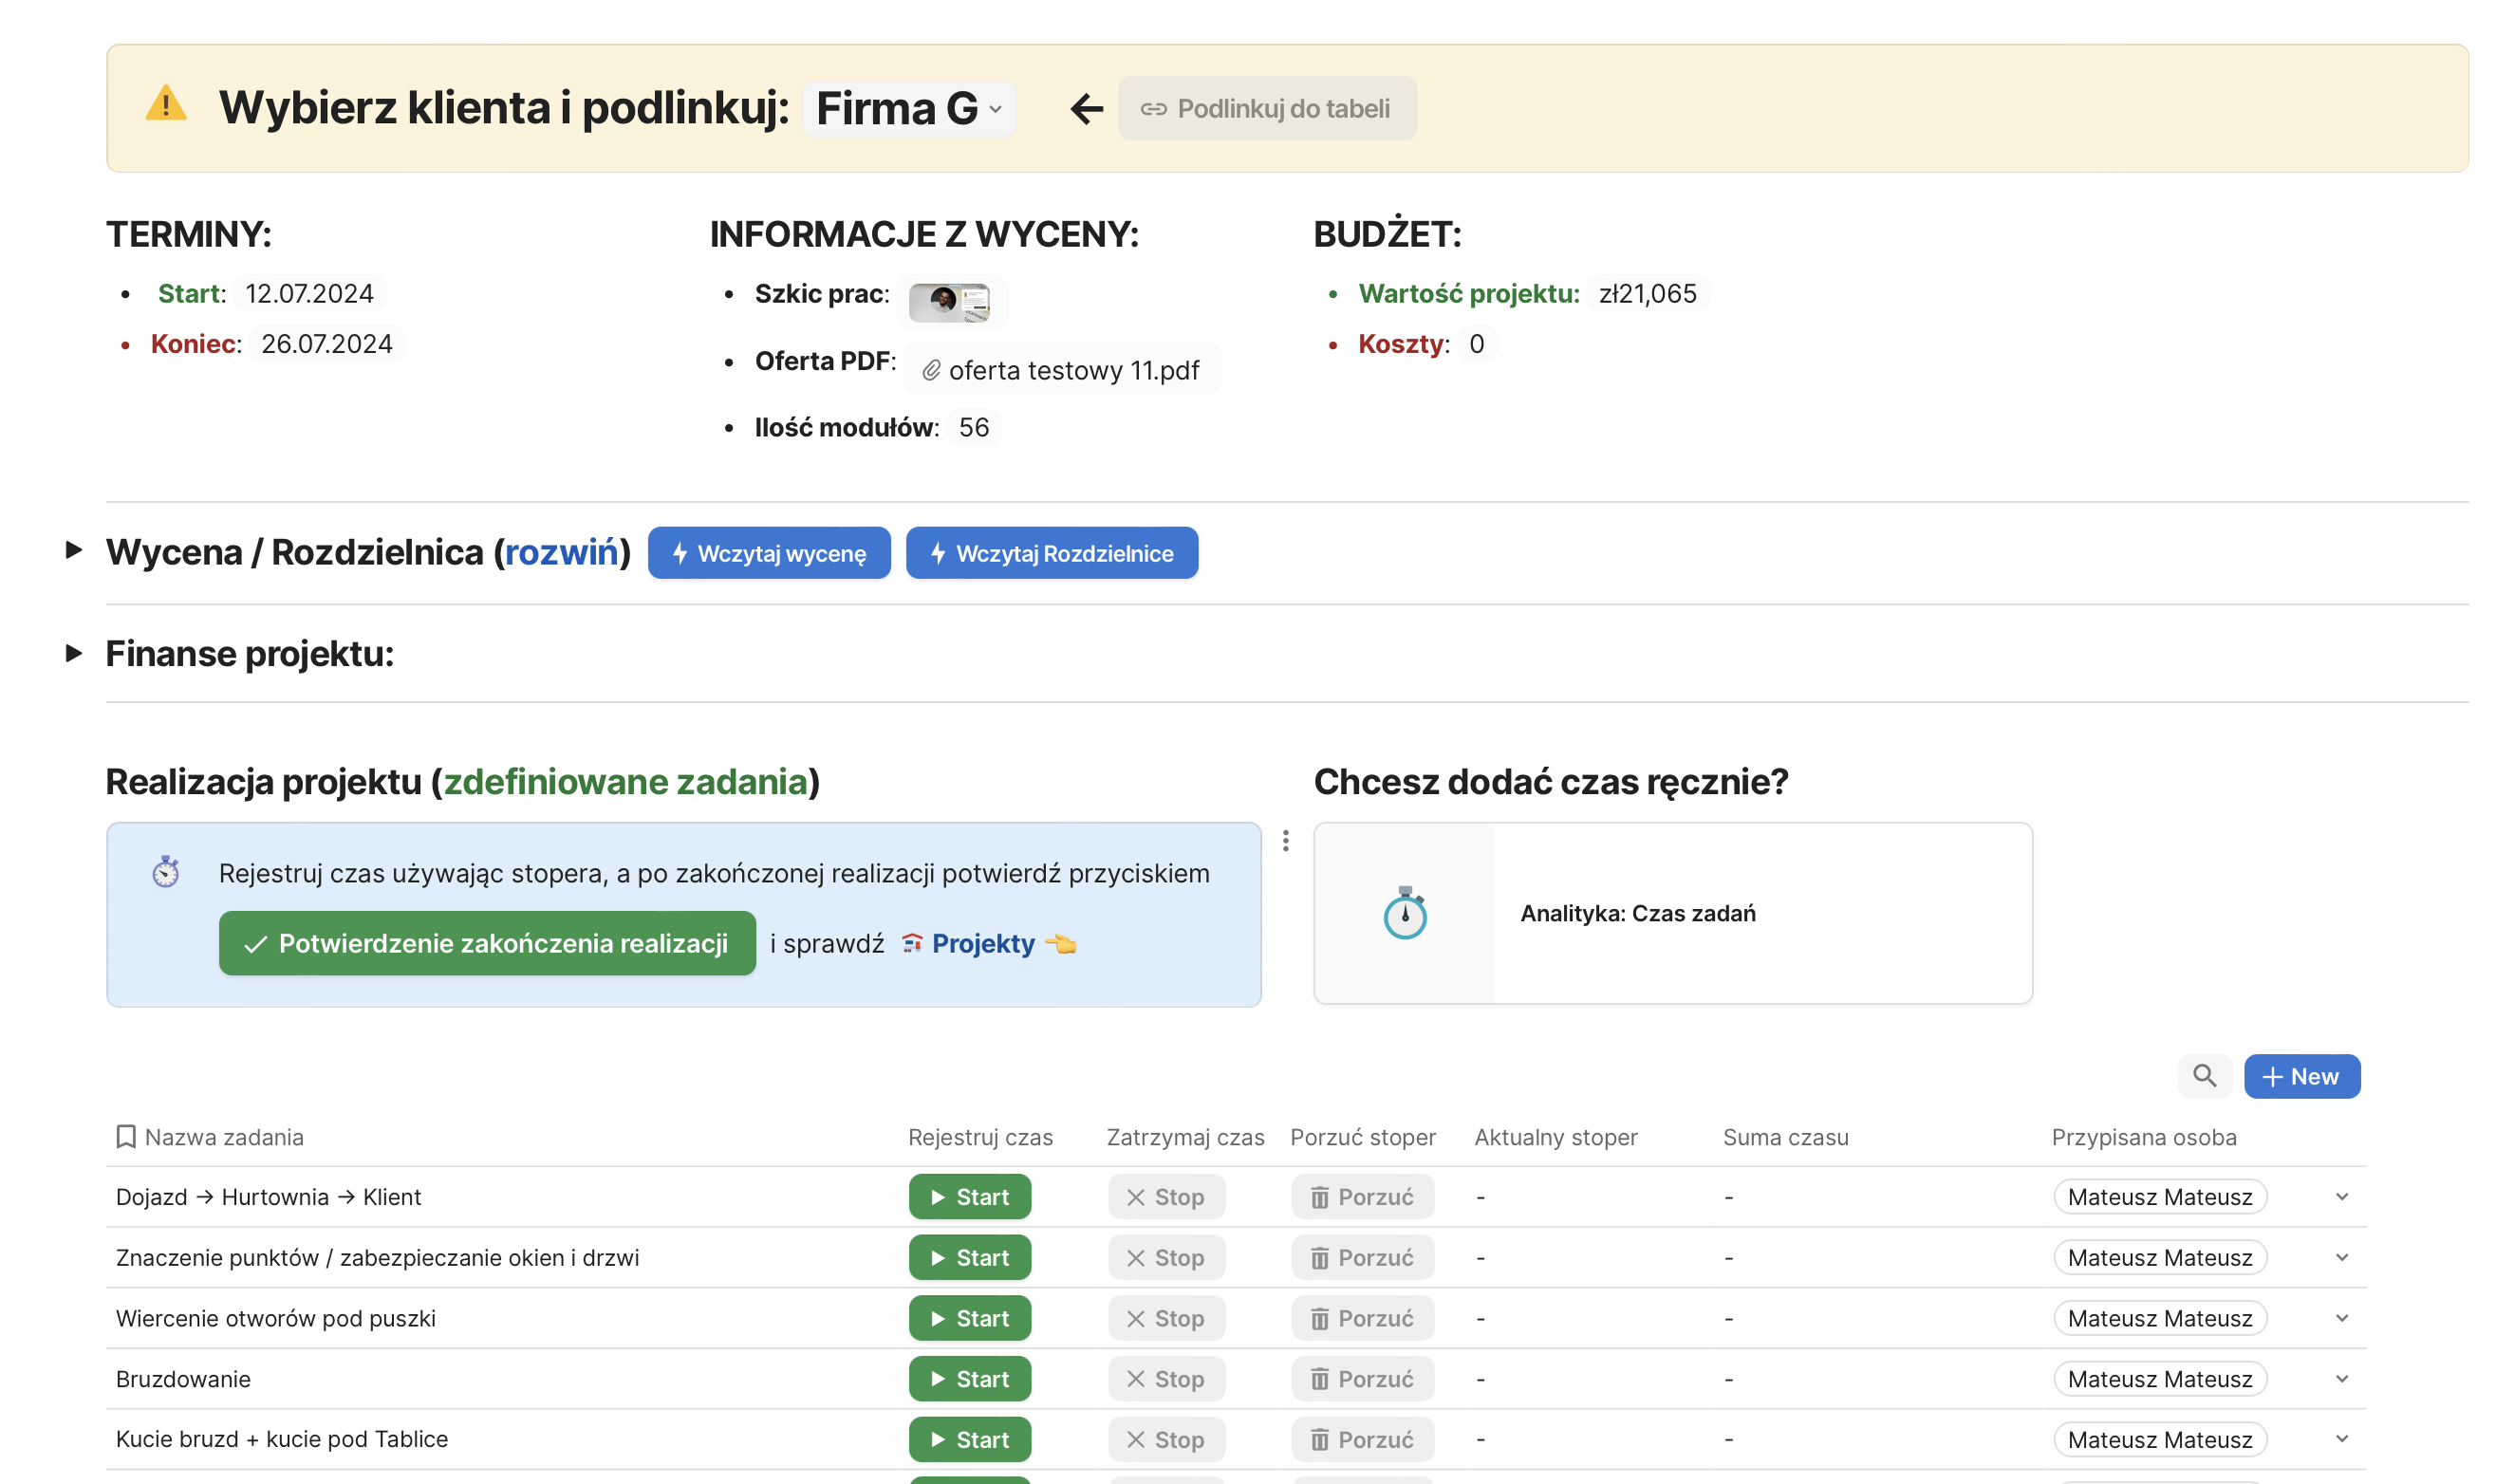
Upon completion of the project, pressing the “CONFIRM PROJECT COMPLETION” button triggers several actions:
– The project is marked as completed.
– A notification is generated in the accounting document indicating the need to issue an invoice.
– The project is removed from the schedule and moved to the pending section for creating the document for construction supervision. In this section, the prepared document only requires selecting the client from a list, and the entire document is ready for printing.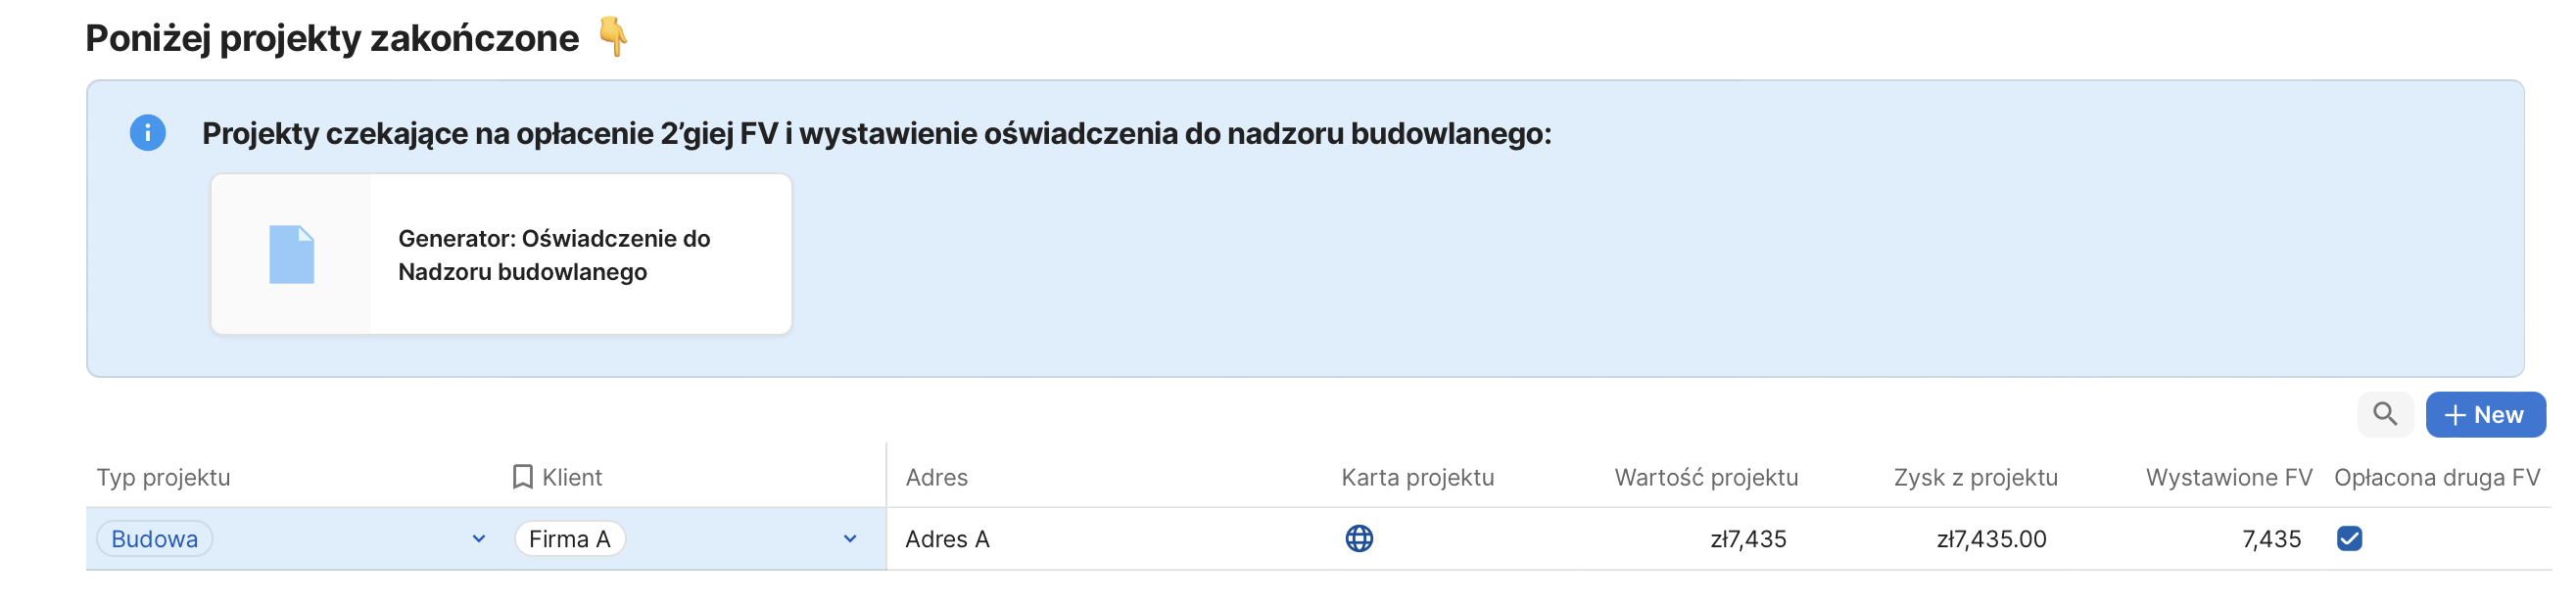
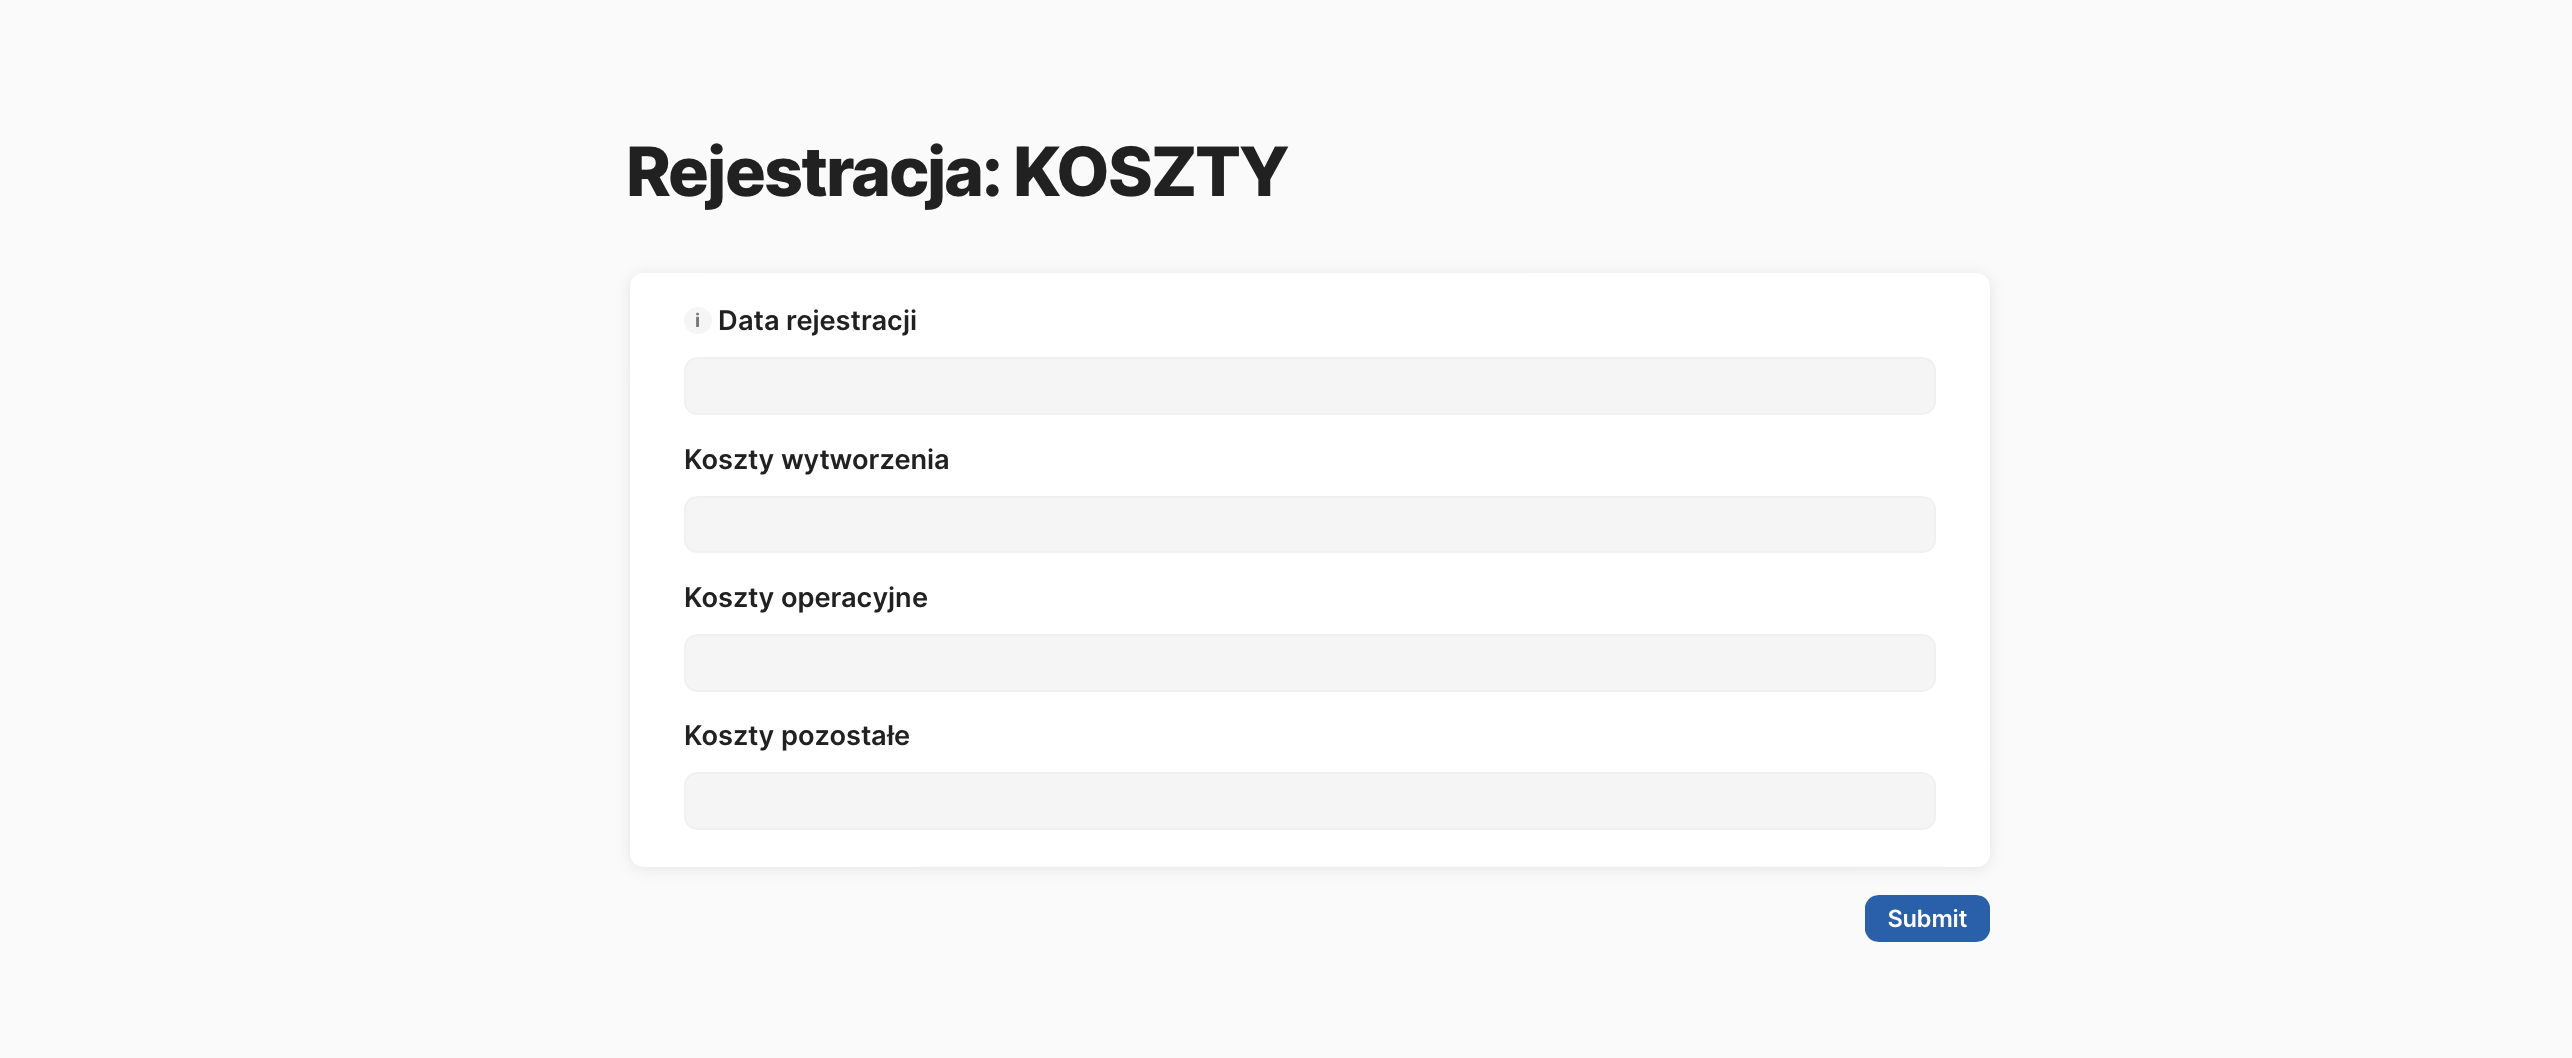
Accounting Module
Check: https://wzorcoda.com/projekty-76
This is the space for registering costs and revenues from operations. Information from this main table updates fields in project cards. Based on the recorded invoices, the system calculates the profit for each project and allows for generating financial reports for individual projects or for Mateusz’s entire business.
Processes / Instructions / Automations Module
Check: https://wzorcoda.com/procesy-instrukcje-automatyzacje-81
As we prepare the entire setup for team collaboration, key company processes and instructions (related to customer service and the new tool itself) have been defined alongside the implementation of the new tool. The system allows for the automatic creation of new documents, complete with a template preview to verify the structure that each type of document should have.
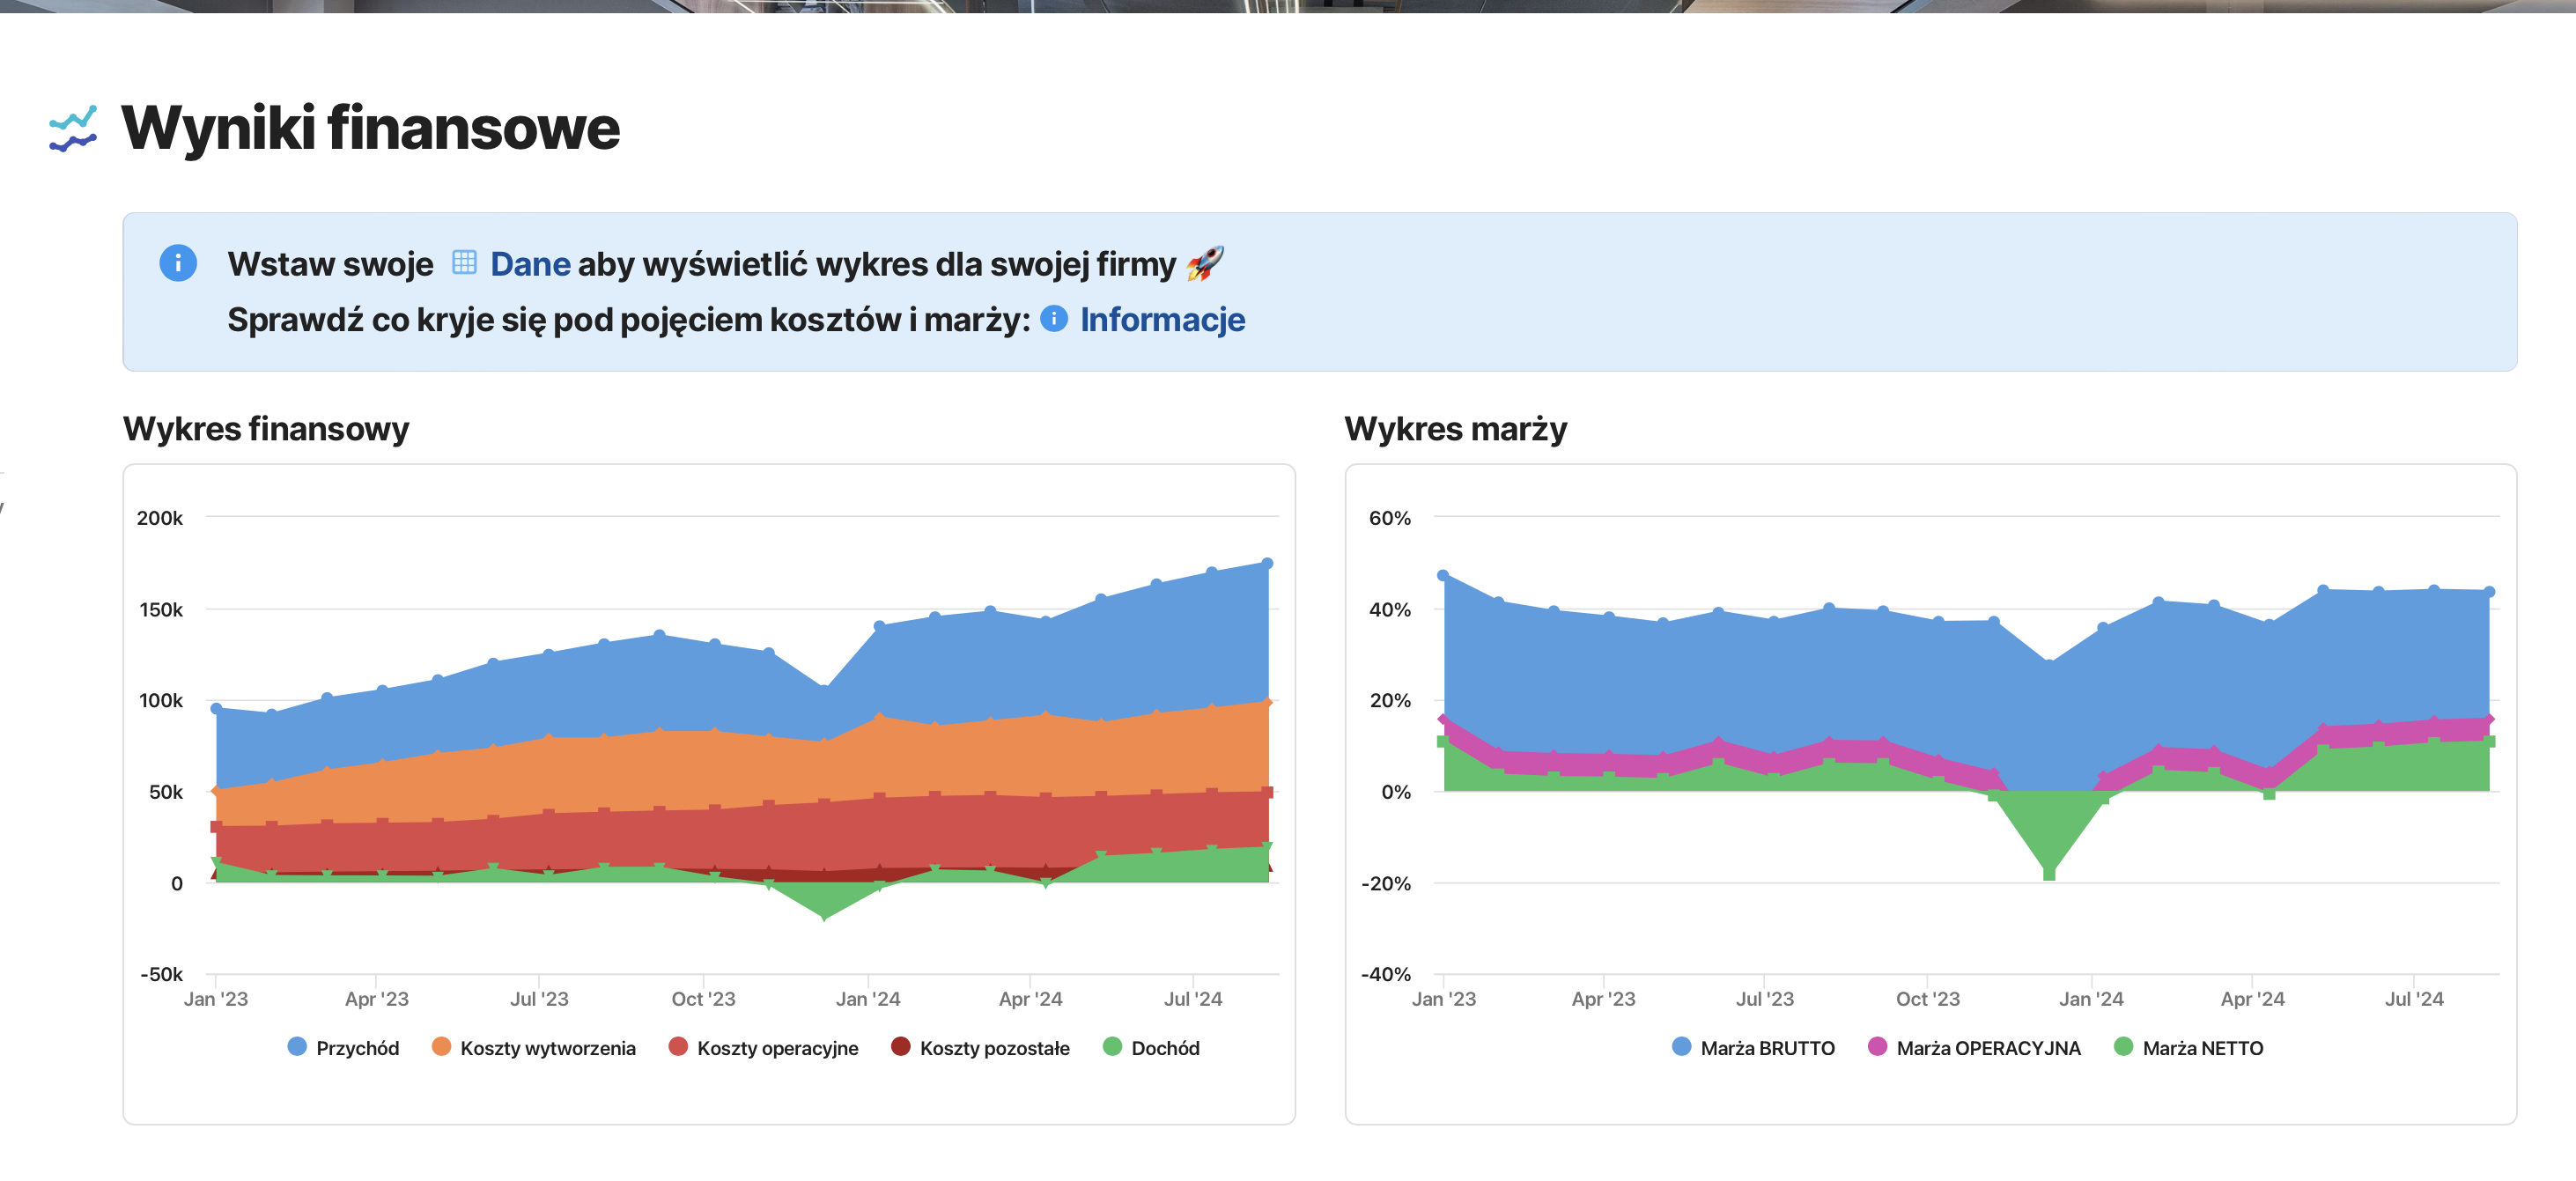
Analytics/Statistics Module
Check: https://wzorcoda.com/analityka-statystyki-prac-82
The final module allows for displaying data related to tasks, team time, projects, and finances. All data is automatically recorded during project execution, eliminating the need for additional actions to gather such information. Why is this view important? Analyzed data enables insights to be drawn, and most alarming results can be automated, ensuring that no one misses notifications about budget overruns, unissued invoices, or negative balances for a given week.
Conclusion
The implementation of this system not only involved creating documents but also standardizing the core processes of the company. The project met all its goals, though some potential automations were deferred to a later stage to optimize costs. The new tool consolidates all key company information in one place, allowing for comprehensive reports and insights from each project.
Paweł Pasterak